 © Apple For years, Apple had taken steps to increase the design appeal and performance of their computers at the expense of repairability. Even if a part was repairable, individual repair shops and consumers did not have timely access to parts and manuals.
That could change in the near future as Apple announces the Self Service Repair program, which will be available in the United States in early 2022. While the program is extremely limited to start, there is hope that this could combat the issue of e-waste, as Apple's own repair services can be cost ineffective. The company announced in a press release that the program will be limited to the iPhone 12 and 13 display, battery and camera assemblies. Apple plans to add parts for their Apple Silicon Macs, but did not provide a concrete timeline nor a list of parts they plan to provide. Customers who return broken parts to Apple will receive a store credit in the form of an Apple gift card, which can be used for products, media and services. Apple will create an online store for the ordering of replacement parts and tools, which may limit the value of the repair program. Even if a customer has the know-how to fix their own device, will living with a broken device for days, weeks or months be worth the cost savings? The ambiguity of this announcement requires a degree of caution around the success of this program. Until the specific parts, pricing and warranty implications are available, it is unknown whether it will have a considerable impact on consumers. For example, the Face ID sensors in the most recent iPhones are assigned to the logic board, meaning a display replacement requires transferring the sensors to the new display. If Apple doesn't trust consumers to conduct this repair — they say most customers should still use professional repair services — they could bundle parts together to create unnecessary repairs. This initiative, which has been championed by some as a victory for right to repair, could end up being the opposite. As mentioned, Apple has the ability to assign parts to logic boards, and can render certain parts useless if serial numbers don't match. If Apple provides batteries to individual consumers, what's stopping them from blocking any third-party replacement battery from powering iPhones? Most of this is speculation, because Apple really didn't announce binding details of the program in their release. Due to Apple's history of restricting parts, and the nature of their new system on a chip processors — most of the computer's processing power is on a single chip — we'll have to wait and see before we can evaluate the value of this program to right to repair initiatives.
0 Comments
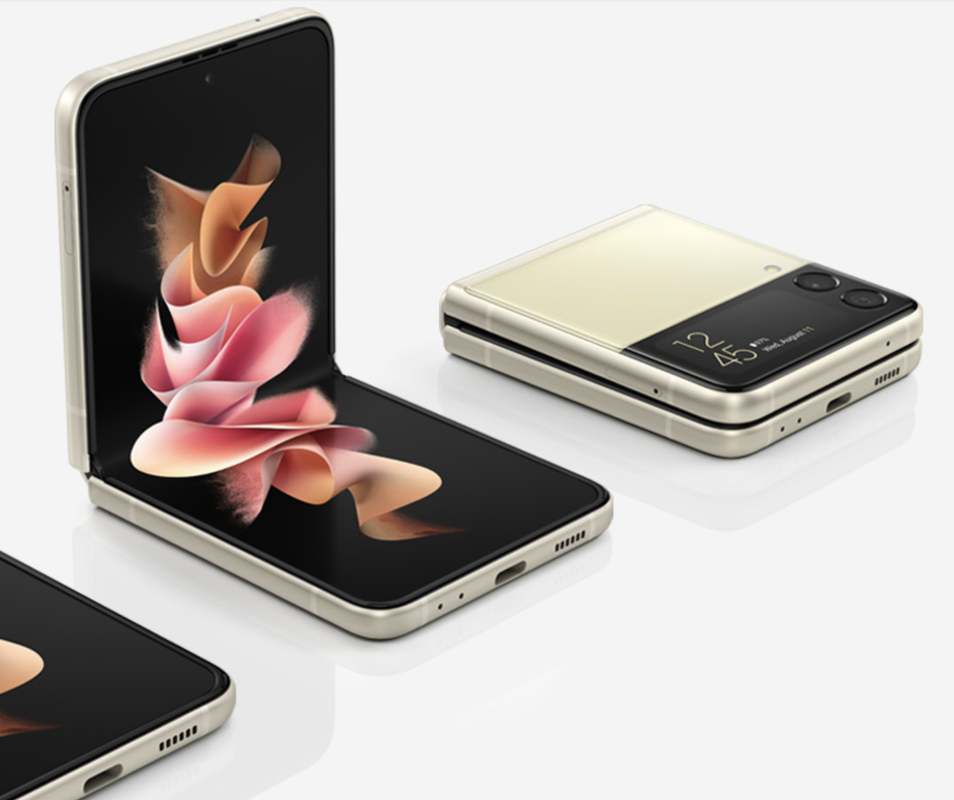 © Samsung The Galaxy Z Fold and Flip 3 have been in the hands of reviewers for a few weeks now, and the consensus is clear: The Galaxy Z Flip 3 5G is the first foldable smartphone that can actually be recommended to real consumers. As a lifelong Apple user entrenched into the Apple iCloud ecosystem, it would take a compelling phone for me to abandon my iPhone—but the Z Flip 3 was good enough, and cool enough, for me to take the leap. The Z Flip 3 marks the most notable improvements from Samsung since they released the original Galaxy Z Flip a year and a half ago. The Z Flip 5G brought a 5G antenna to the phone and other minor improvements—though not enough to warrant much notice. However, this new Z Flip brings upgrades in display technologies, build quality, durability, and more. 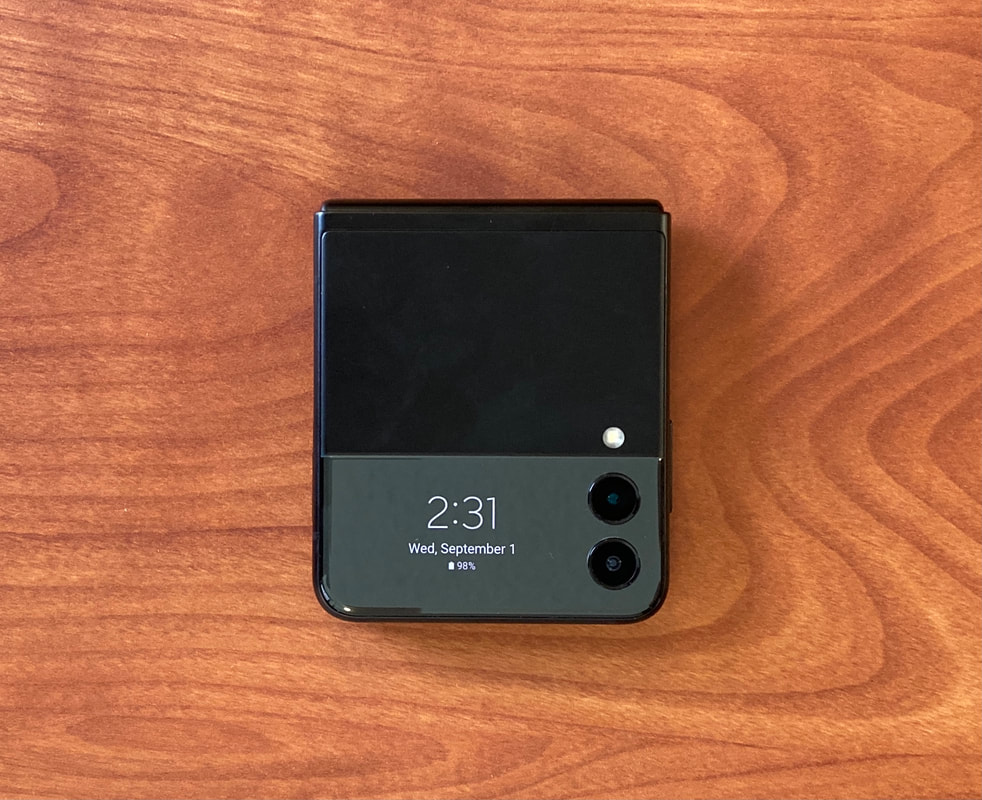 Galaxy Z Flip 3 Cover Display © Brady Snyder, 2021 The new displays are the immediate difference makers in daily use for the Z Flip 3. The cover display is now four times larger, and shows up to four lines of text in an always-on format. This allows use for notifications and widgets including music controls, weather, and quick timers. While this may seem intangible in daily use, it is quite the opposite. The compactness of the Z Flip 3 is nullified if you have to flip the device open every time; however, the cover display allows you to receive vital information without that added step. 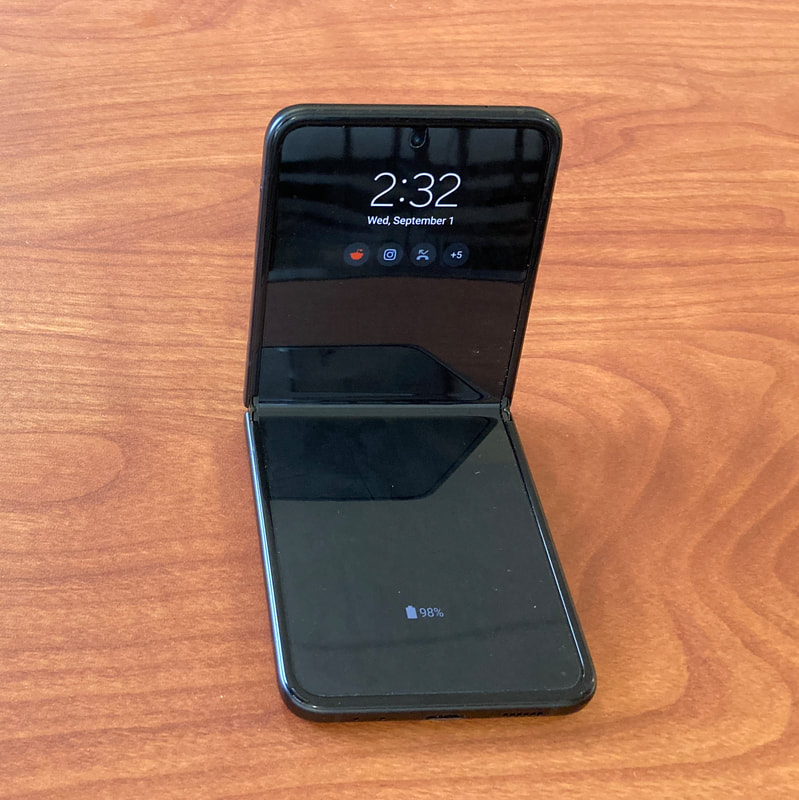 6.7" AMOLED Display © Brady Snyder, 2021 The inner, 6.7" AMOLED (Active Matrix Organic Light Emitting Diodes) display is upgraded as well with adaptive refresh rate, which allows the phone to automatically toggle between 60 Hz and 120 Hz refresh rates depending on the situation. It gives the phone a smoother user interface overall, and is crucial to serious gaming on-the-go. Unfortunately, unlike other Samsung phones with this technology, there is currently no setting to apply the high refresh rate all of the time. Most likely, the lack of this setting is due to the already underwhelming battery. The two-cell, lithium polymer battery inside the Z Flip 3 is rated at just 3300 mAh, which is significantly less than other phones in its class. Of course, this is a casualty of the fold, which requires the phone to be relatively thin when folded shut. In my daily use of the phone, the battery was decent, but falls short of flagships like the Galaxy S21 Ultra and the iPhone 12 Pro Max. Charging conveniently throughout the day—in cars, at desks, et.—I was able to make the Z Flip 3 last a full day without much "battery anxiety." 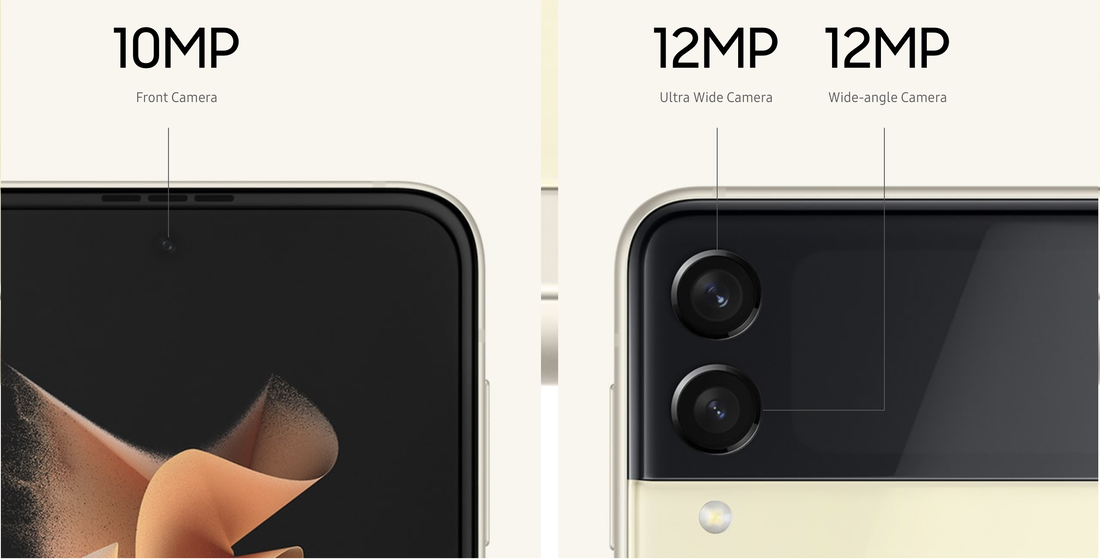 © Samsung Another feature that is cannibalized by the folding form factor of the Z Flip 3 is the cameras. The main cameras are dual 12 MP sensors that are wide and ultra wide apertures. The cover display allows these cameras to be used as selfie cameras, though there is an inner, 10 MP wide sensor for traditional selfies. All cameras are capable of shooting 4K video at 30 FPS, though the main cameras can be set to record 4K HDR at 60 FPS. While these cameras are adequate in ideal conditions, they struggle in subpar, low light situations. Specifically, the selfie camera quickly becomes grainy and pixelated in dark scenes. In those great scenarios, though, the Z Flip 3 is more than capable—the picture below was taken with the Flip at Citi Field and the finished product is fantastic.  Captured with the Galaxy Z Flip 3 © Brady Snyder, 2021 As strictly a smartphone the Z Flip 3 elegantly blends comfort and functionality. Under the hood, it features the Snapdragon 888 5G chip and eight gigabytes of RAM–the same as other Android flagship phones. For the first time in the Flip line of phones, the Z Flip 3 sacrifices nothing in terms of computational performance. In terms of comfort, the hinge can be set to any position, allowing the phone to be comfortable cradled for phone calls, mounted for pictures, and positioned for many other unique use cases. 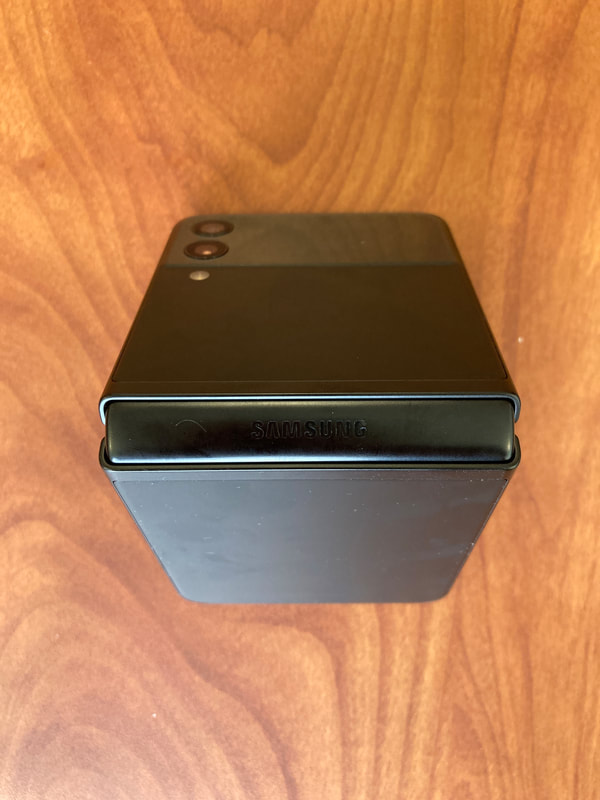 © Brady Snyder, 2021 The positive changes to the durability of the Z Flip 3 solidify it as a foldable ready for consumers. The Flip has been certified as IPX8 water resistant, which means it can be submerged in up to 1.5 meters of water for as long as 30 minutes. However, it was not certified for dust resistance, and it remains to be seen whether dust entering the phone will be a long-term issue. Additionally, the aluminum used for the body of the phone has been strengthened to a material Samsung calls "Armor Aluminum." The screen is the same plastic front we saw in the original Z Flip, though the Z Flip 3 now comes with a pre-installed plastic screen protecter that protects the actual screen. Samsung recommends that users keep the protector on for the life of the phone, essentially making the protector a part of the display. The outer display is covered with Gorilla Glass Victus, which is the strongest glass Gorilla Glass has produced thus far. Overall, it is hoped that these changes will end the durability questions brought forth with Samsung's original foldables, but only time will tell. It's clear that is you're looking for the highest end device, you won't find it in the Z Flip 3. You'll find it in the Galaxy S Series, the iPhone Pro series, or even in the Z Fold series. However, if you're looking for a small, fun device that changes the way you use your phone—the Z Flip 3 may be the phone you're looking for.
I was, I ditched my iPhone for the Z Flip 3 and have not looked back since. If you're considering making the same switch, stay tuned, because I'll be documenting the peaks and valleys of this switch from iPhone to Android.  © Apple On April 20, Apple announced a brand new product based on their existing Find My network, the AirTag—a wireless GPS tracker that for $29 can keep track of all your most important items. The tracker, which includes the U1 ultra-wideband chip, is poised to take on market leader Tile, the tracker company that currently holds 90% of the wireless tracking market share. The AirTag's functionality is expected to be superior to other trackers due to the Find My Network and the ultra-wideband integration. When an item is marked as 'lost' within the Find My app, the item's location updates on a GPS map every time it is in range of another iOS device. According to Apple's CEO Tim Cook, there are an outstanding 1.65 billion active iOS devices that can help find a lost item as of January 2021. That number is only expected to grow, meaning that Apple's Find My network will be the most expansive tracking network on launch day. 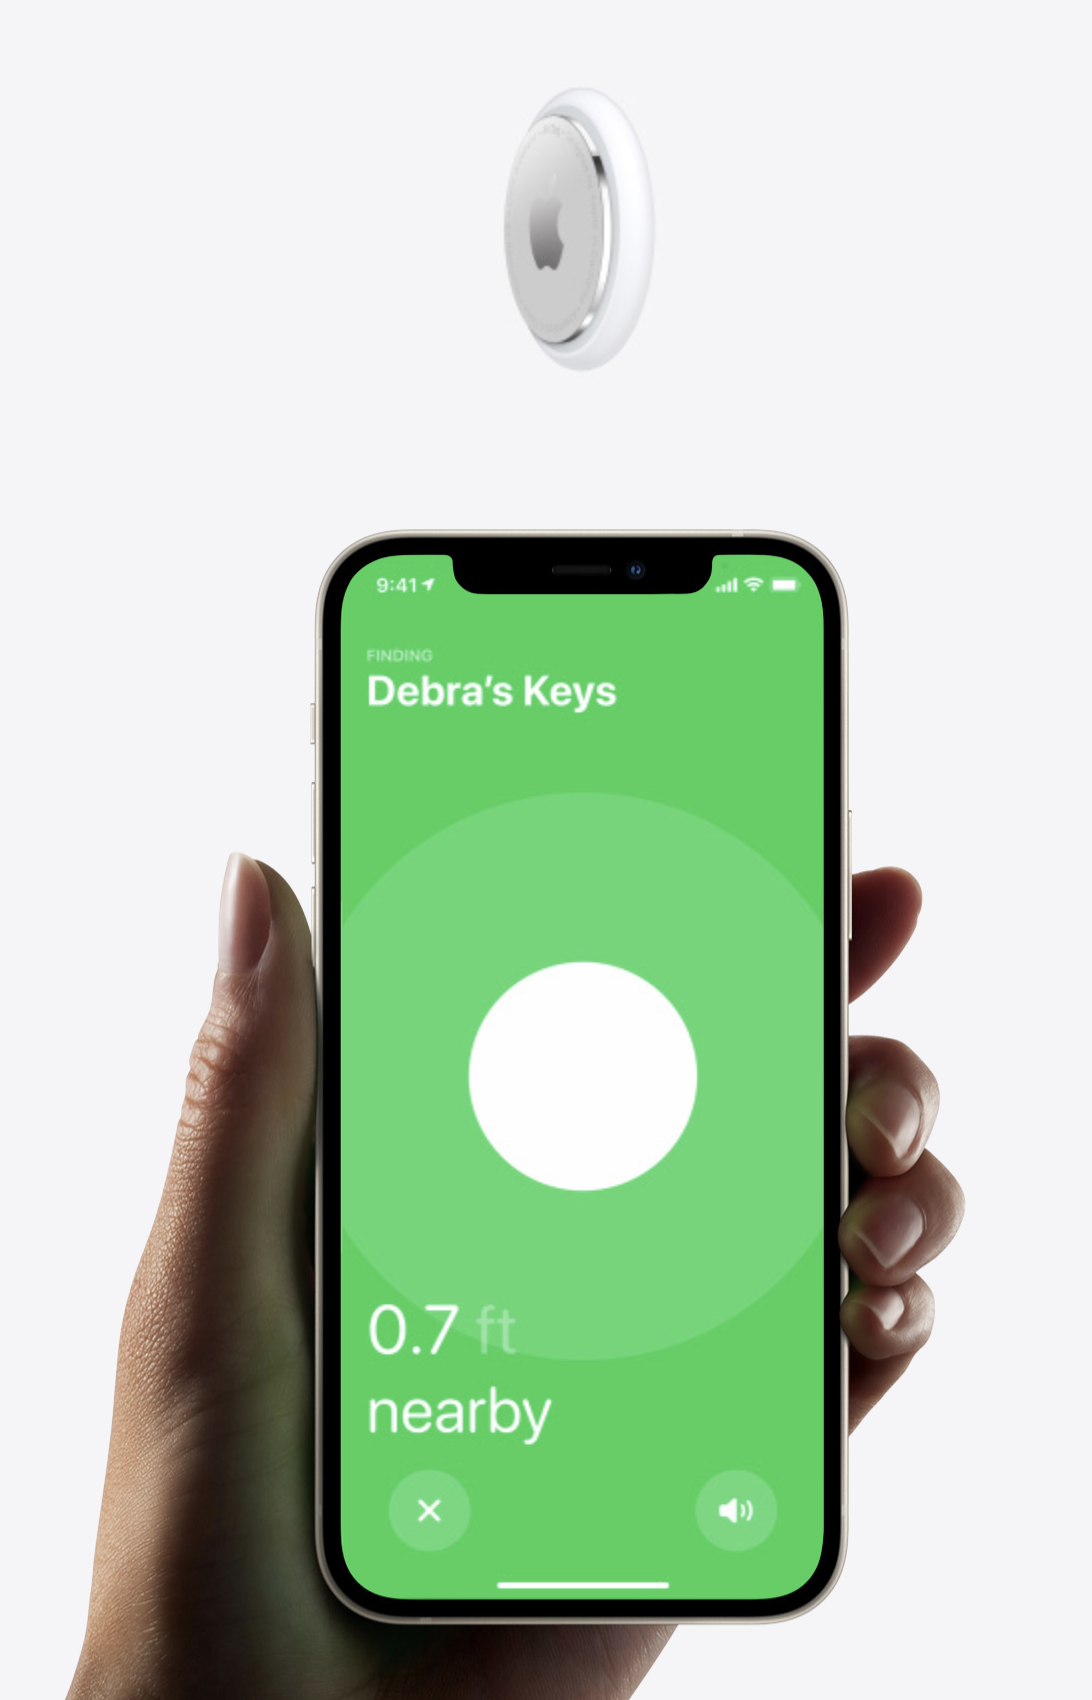 © Apple Surprisingly, an even more promising feature is the ultra-wideband directional tracking available on U1 devices. While on an iPhone 11 or later—as well as the newly announced iPad Pro 5G—the Find My app will direct you to your item within a foot of its location or even less, as shown in the graphic from Apple. This works from up to 30 feet away, and out of range the item will be visible on a map displaying the item's last registered location. The cost of these trackers—$29 for a single tracker and $99 for a pack of four—are priced similarly to other market competitors, such as Tile. However, the AirTag does not include a means for attaching it to other items. Keychains and luggage tags are sold on Apple's website for as little as $12 and as much as $450 for Apple's Hermès line of AirTag casings. The announcement was not without controversy, though. AirTags competitor Tile's CEO CJ Prober has claimed that AirTags are noncompetitive and a violation of United States' Antitrust laws. As Apple battles antitrust inquires from all angles—including Congress, Epic Games, and now Tile—the following statement from Prober is a clear line in the sand: We welcome competition, as long as it is fair competition. Unfortunately, given Apple's well-documented history of using its platform advantage to unfairly limit competition for its products, we're skeptical. And given our prior history with Apple, we think it is entirely appropriate for Congress to take a closer look at Apple's business practices specific to its entry into this category. — Tile CEO CJ Prober The AirTag is expected to be a great product for the forgetful among us, but it sets the stage for a final decision on whether big tech companies will be reprimanded for noncompetitive behavior.
 Copyright © 2021, Elite Obsolete Electronics. Austin Lucas, the founder and CEO of Elite Obsolete Electronics, has both participated in and monetized the iPod repair market. Lucas sources parts for iPods, lists them on his online store, and ships them to buyers all around the United States. Additionally, he modifies and repairs iPods that are pre-built in his Kansas City office and shipped to eager buyers. But how exactly did Lucas build an entire business based upon decades-old technology? The answers may surprise you. The BeginningLucas had a passion for technology and self-repair early on in his life. “When I was a kid, I loved technology and iPods obviously, but I would always mess around with computers,” Lucas said. “I built my own computer when I was in seventh grade.” Some may go their entire life without opening consumer electronics once, yet Lucas began this hobby before starting high school. He wasn’t content with just building the occasional personal computer and saw a vision of using this hobby as a potential career. By the end of high school he had taken the steps to make this a reality. “By the time I was a senior in high school I had gotten my first job as a professional repair technician at a walk-in shop; I fixed iPhones, iPads, Macs — really whatever came in through the door you'd take a look at and see if you could fix [it]. I worked that job, for multiple companies, for about four years while I was in college working part time (full time in the summers).” Again, Lucas saw another opportunity make use of his technical prowess. This time, it involved one of his first passions in the field of technology—the Apple iPod. Lucas’ childhood was spent “watching iPod keynotes,” and he realized that “a lot of people have a soft spot for iPods.” Unfortunately, passions and hobbies can only propel a business so far; there has to be a market for the product as well. Suprisingly, despite most iPods being decades old in 2021, there was a market—and a big one at that. Lucas recalls, “I would notice that people would come in with these iPods, asking if we would fix them. Just to put a new battery in, the simplest of the simple repair, and we would turn them away.” For a period of time, Lucas continued sending potential customers away. At the time, even he thought that “they were really difficult to open.” Once again, however, his desire to pursue greater interests in technology continued. Lucas explains, “One day it clicked with me that, around the country everyday thousands of people are walking in for an [iPod] repair and they're being refused a repair and being told to buy one online. I thought, wow, that is a huge market.” The Mission of Elite Obsolete ElectronicsLucas says this realization “encapsulate[s] the spirit of Elite Obsolete [Electronics] as a whole.” When every other repair shop refuses to repair or source parts for an ‘obsolete’ product, Elite Obsolete Electronics, with Austin Lucas at the helm, is there to help. The “huge market” that catalyzed Lucas’ entrepreneurship into the realm of iPods surprised even Lucas himself. “I was surprised to see that there was a pretty big market for iPods from people in their 40's. They've been using an iPod for over a decade and they have built up a library on iTunes, and the easiest solution for them when their old [iPod] breaks is to go buy a new one, not being bothered by iTunes or Apple Music or Spotify.” Lucas Focuses On Elite Obsolete Full-TimeThroughout this entire journey, from middle school hobbyist to professional repair technician, absent is a formal education. In his own words, Lucas says “I did not have any formal education, as far as being a repair technician, that was all self-taught. I didn't even go to business school—I dropped out of college to pursue [Elite Obsolete Electronics] full-time.” Many would see this—dropping out of college to pursue decades-old technology—as a big risk. It is, but it paid off. “That was almost two years ago, that I've been doing this full time,” Lucas said. “[I'm] fully self-funded, haven't even taken out a loan. It's been a one-man job this whole time.” The Future of Elite Obsolete ElectronicsThe relatively early success has allowed him to explore other opportunities in technology and expand his company. He explains, “I've tried a handful of other ventures, but I decided to keep my hands full with iPods, [it's] just what I do best.” Longer-term, however, Lucas has bigger plans. “In the summer, I'm planning on expanding from the one-person job it is right now to branching out and going 'full-on' in those other ventures.” Repairability in Modern TechnologyThe technology sect of mainstream media paints the ‘right to repair’ as the sole issue in third-party repair. According to Lucas, a repair technician himself, this isn’t so important. He continued, “There's a certain ruling by the Supreme Court that allows me to do what I do. It's the second sale doctrine.” For those who may not be familiar with this doctrine, it is the principle upheld by the Supreme Court that allows consumers to buy, modify, and sell products secondhand. Lucas, in his own words, calls this the “underlying backbone to the entire industry.” Despite the fear that modern advancements will prevent others from modifying future vintage technology, the industry is confident it will adapt. Lucas claims, “As the market evolves, I'm sure that the skills necessary to make money in that market will also evolve.” Why Independent Repair is Crucial to TechnologyEspecially in a field as sophisticated as technology, there is always value in obsolete products. Austin Lucas has found a way to both profit off of these products and bring broken ones to life by founding Elite Obsolete Electronics. Every time a vintage product is reclaimed, one less product ends up as e-waste in a landfill. Despite the potential pitfalls, Lucas is confident that creative technicians like himself will find new uses for vintage technology.
Check out Elite Obsolete Electronics for yourself at eoe.works. 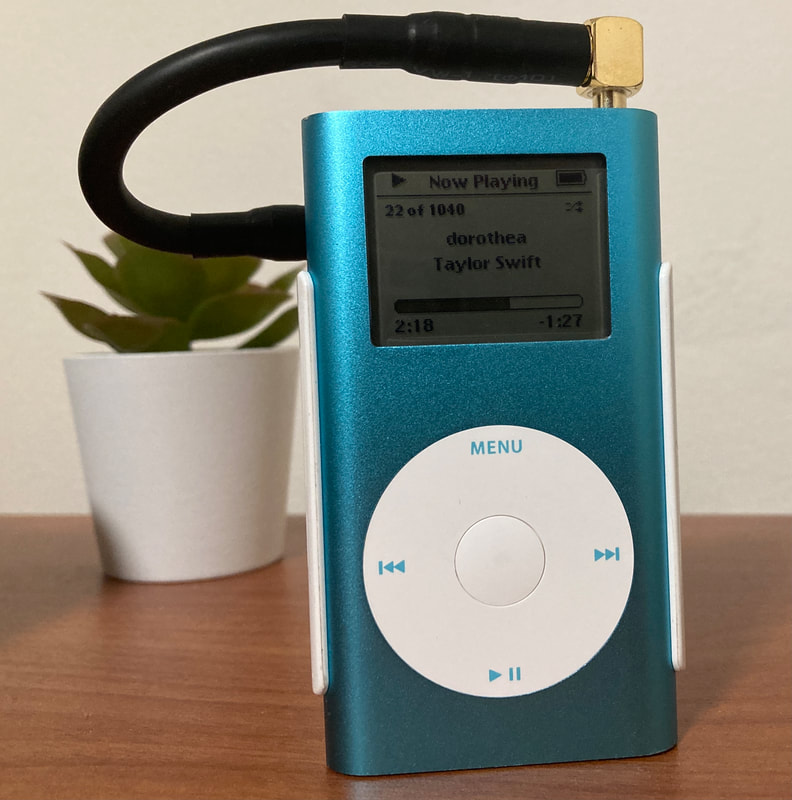 © Brady Snyder A few weeks I introduced you all to the world of iPods and MP3 players. There are real, logical reasons to use an iPod over a streaming service—even beyond the minimalism and nostalgia. One key reason is storage. Music files are getting larger and larger, and people that plan to keep all of their music on their cell phone may struggle to find space. I recently switched to the base model iPhone SE with only 64 gigabytes of storage. For comparison, I came from a 256-gigabyte iPhone XS Max with about 150 gigabytes of storage used. In order to make this switch work, I had to find other ways to store files and media, preferably without having to pay Apple for additional cloud storage. That’s where the iPod Mini comes into the picture. As shown in the title picture, the iPod Mini is a sleek media player (by 2005’s standards) that is fully capable with syncing to modern Macs. With a FireWire-capable Mac, the charge and sync capabilities are downright impressive, even by 2021’s standards. 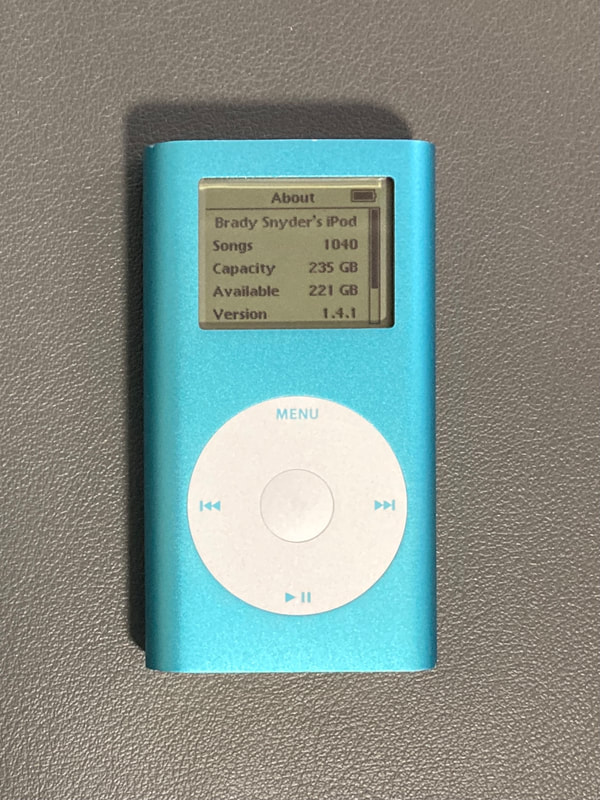 © Brady Snyder Apple designed the iPod Mini to be easy to repair, and that is what makes this setup possible. The iPod Mini uses a Seagate MicroDrive, which is an ultra-thin hard drive that is small and compact enough to fit into the tiny chassis of the Mini. As such, the hard drive and its respective ribbon cable uses the Compact Flash standard, meaning we can upgrade the Mini with ultra-fast and modern flash storage. With the Compact Flash adapter installed, the iPod Mini can run a 256-gigabyte MicroSD card with stability. That’s right—my 2005 iPod Mini has the same amount of storage as the base-model 2020 MacBook Air. With a 256-gigabyte iPod, you can store roughly 15,000 Compact Disc (CD)-quality songs without wasting a single byte of your smartphone’s storage. 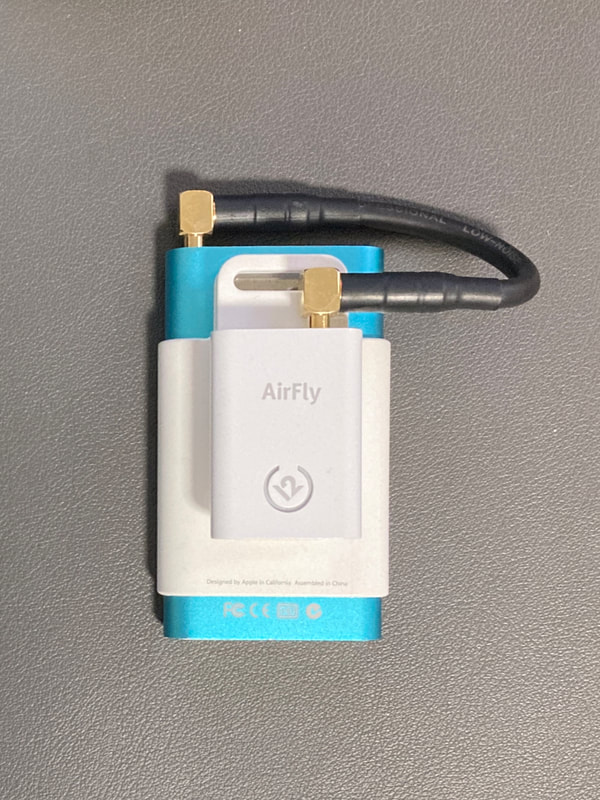 © Brady Snyder As it stands right now, the iPod Mini is a high-volume music player. With a few more upgrades, it can be so much more functional. I chose to add Bluetooth via the AirFly, which I reviewed two weeks ago. The iPod Mini comes with a clip that allows you to slide the iPod right onto your clothing. With a single Command strip, I was able to attach the AirFly to the iPod Mini’s clip, making for a removable and portable Bluetooth modification. With the AirFly attached, I’m able to use the iPod Mini with PowerBeats Pro, AirPods Pro, and any Bluetooth device. 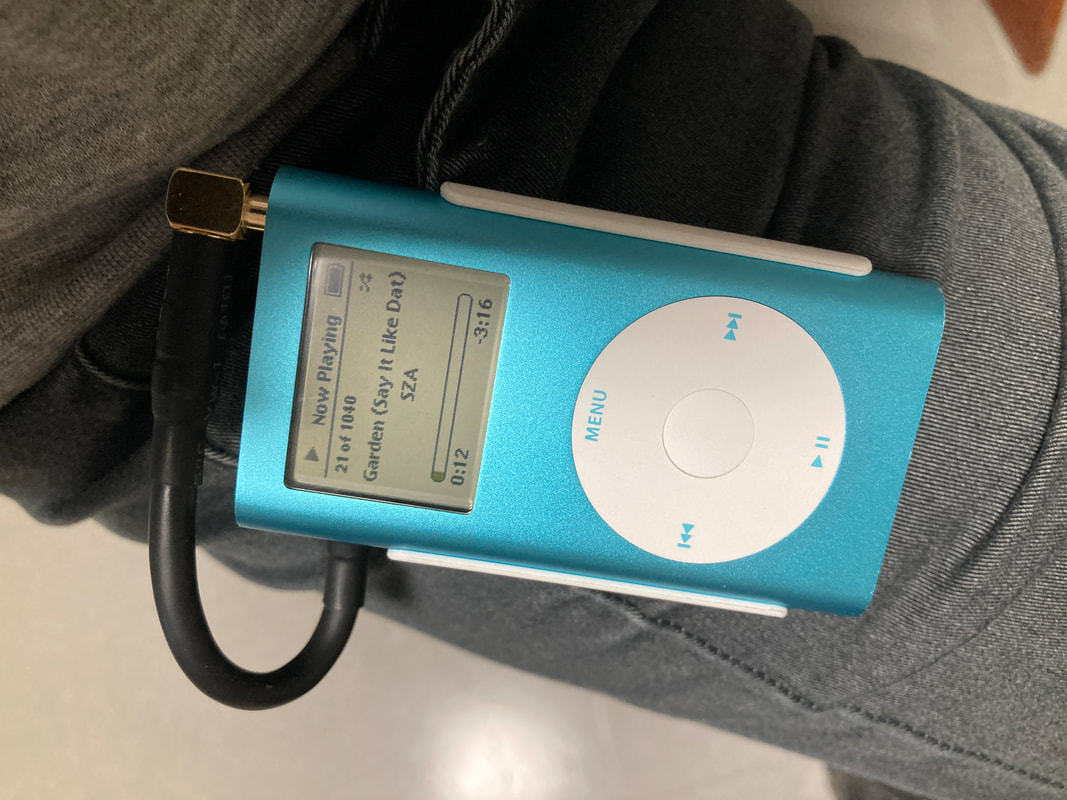 © Brady Snyder The iPod Mini was the device that paved the way for the microelectronics necessary for modern portable electronics. Now with a few simple modifications, the Mini now supports 15,000 songs, Bluetooth, and out-of-sight control with the clickwheel. Give it a try and see how a “mini” music player feels with numerous advantages over a traditional smartphone. Remember, smartphones are capable of doing lots of tasks, but they aren’t perfect at doing any one task. Sometimes, a lot of devices that specialize at one task is a more enjoyable experience than a “jack of all trades, master of none” smartphone.
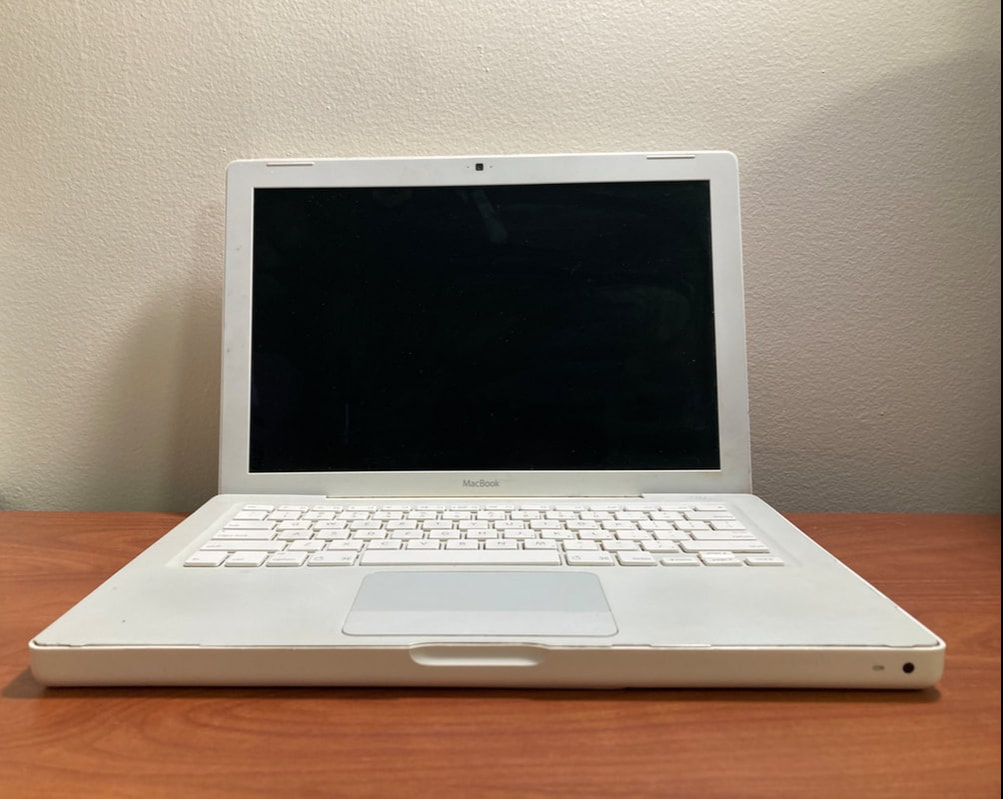 Apple’s new computer chip, the M1 system-in-package processor, has taken the computer world by storm. The M1 can outperform many similar low power chips by Intel and even AMD while running in an emulation layer. This type of performance is unprecedented—but Apple’s CPU changes aren’t. They’ve gone from Motorola to the PowerPC coalition, from PowerPC to Intel, and they are now in the transition from Intel to “Apple Silicon.” What can we learn from these earlier transitions that apply to this one? Apple’s switch from PowerPC to Intel is the most direct comparison. The company’s Power line of computers were performing well, but Intel’s chips were performing better. There is a key similarity here—the A13 Bionic in the iPad Pro regularly outperformed the base Intel i3 chip in the Macbook Air. 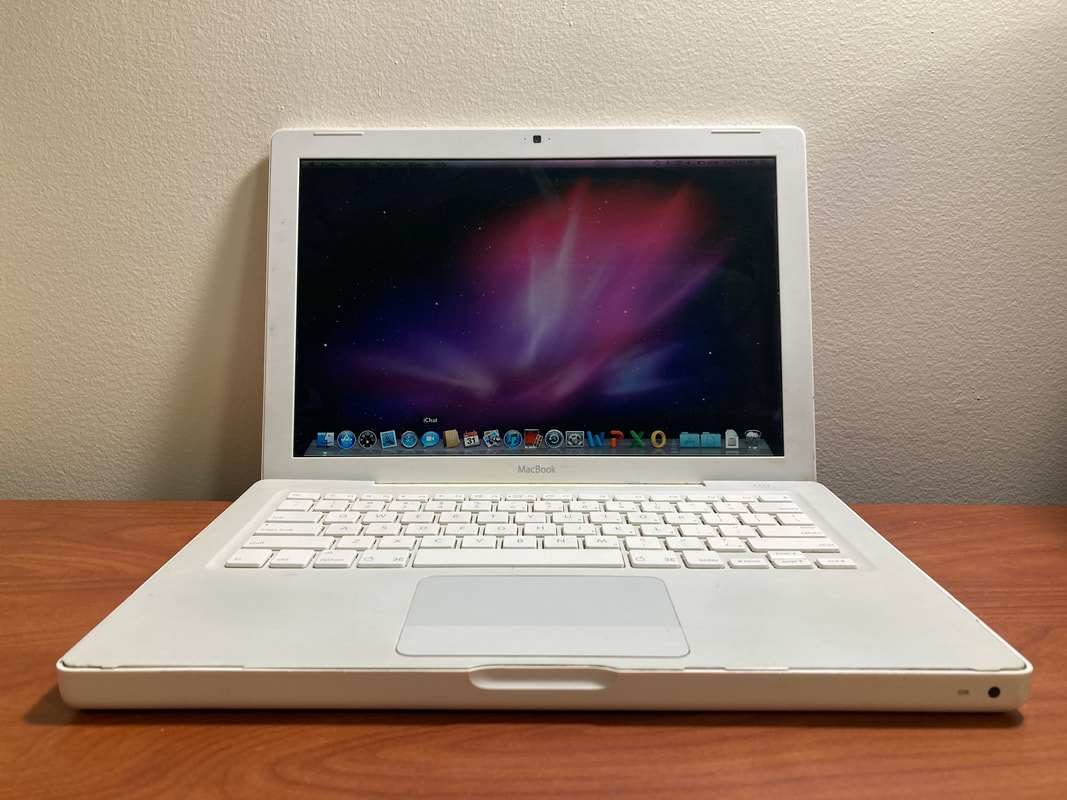 The key difference in the Intel transition was that Apple rebranded and redesigned their portable computers as “MacBooks,” as opposed to iBooks and PowerBooks. This hasn’t been the case so far. In fact, the external housings for the new Macbook Air, Macbook Pro, and Mac Mini are completely unchanged. As a result we can expect the design of these computers to be updated very soon, possibly with new 14” and 16” laptops that take advantage of the low-power Apple Silicon. However, the most important thing to learn from these transitions is one key point: the second generation products always have more support than the first. There is no better example of this than the transition to Intel, and thus, to MacBooks. The first ever Macbook, a glossy snow-white polycarbonate laptop, was released in early 2006 with an all-new Intel Core Duo processor. It was a massive improvement over the previous generation of PowerPC laptops. What followed was only one additional software update, and the original MacBook became obsolete in just a few years.  Just months later, Apple released the upgraded late 2006 models of the MacBook with Intel’s new Core 2 Duo processor, a dual core chip which greatly improved the machine. Two models were released: a glossy white polycarbonate MacBook and the only ever matte black MacBook, affectionately dubbed the “BlackBook.” The new Core 2 Duo MacBooks received more software updates than the original MacBook despite being released just months later. The 2009 unibody MacBook can run MacOS 10.16 Catalina, a software update that was released ten years after the MacBook was released. There’s a pattern here. Although the original MacBook (Intel) was groundbreaking at the time, it aged horribly. The BlackBook and new MacBooks aged better, but still became obsolete quicker than expected. The 2009 Macbook, released three years after the Intel transition began, can be patched to run the latest MacOS 11 Big Sur.  To learn from this history, we have to be cautious when purchasing new MacBooks. If you have to buy a new computer, you won’t be disappointed with a new M1 Mac. But if you don’t—and you’re just impressed by the M1’s performance—don’t buy it. The next Apple Silicon line of MacBooks will be significantly better than the M1, and the only proof that I need is that I am typing this entire article in Microsoft Word 2011 on the 2007 BlackBook.
Apple follows its history, and its patterns are known. The second generation MacBooks, iPads, iPhones, Apple Watches, and other Apple products have been significant improvements over the first. If you’re in awe of the M1, be in awe from afar—because something much greater is coming in the near future. 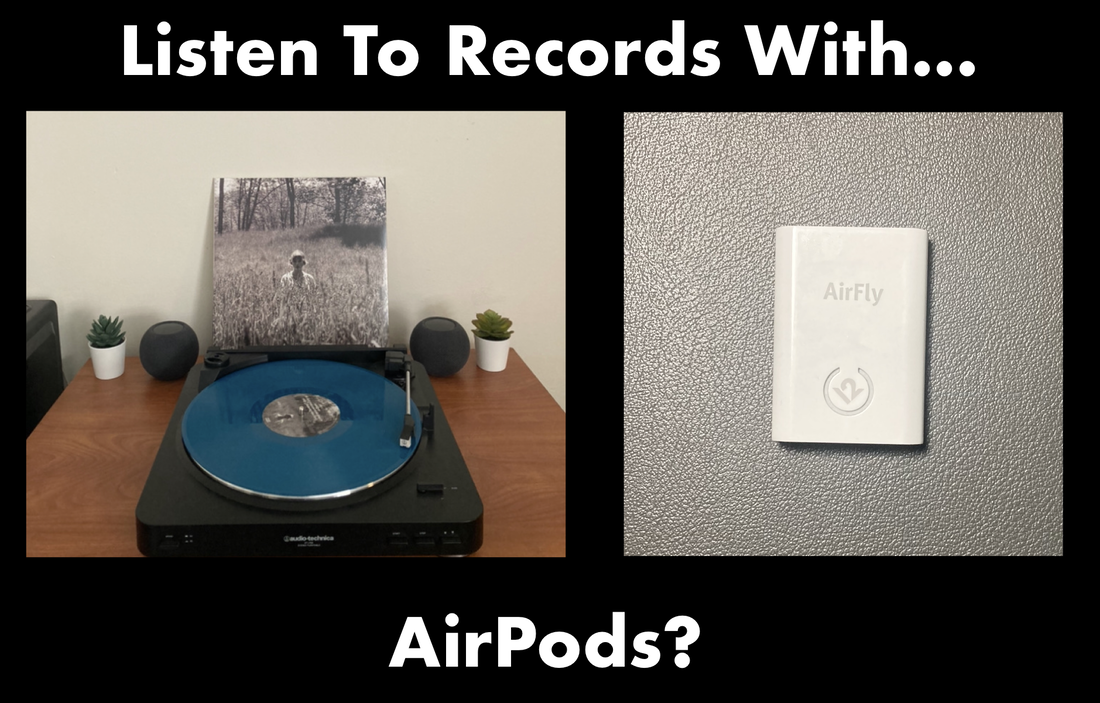 © Brady Snyder Physical media is making a comeback. In 2020, vinyl was the largest seller of "pure album" sales. A pure album is an album purchased digitally or physically, and this does not include streaming services. In this context, that means that most people that enjoy music will usually stream and own physical copies of music. True-wireless headphones are the cheapest and most popular they've ever been—it's impossible to walk through New York City without seeing tens of AirPods, Powerbeats Pro, Galaxy Buds, and various smaller earphone models. So what happens when you want to connect bluetooth headphones to a record player? An MP3 player? Older computer? Even the latest Nintendo Switch models? 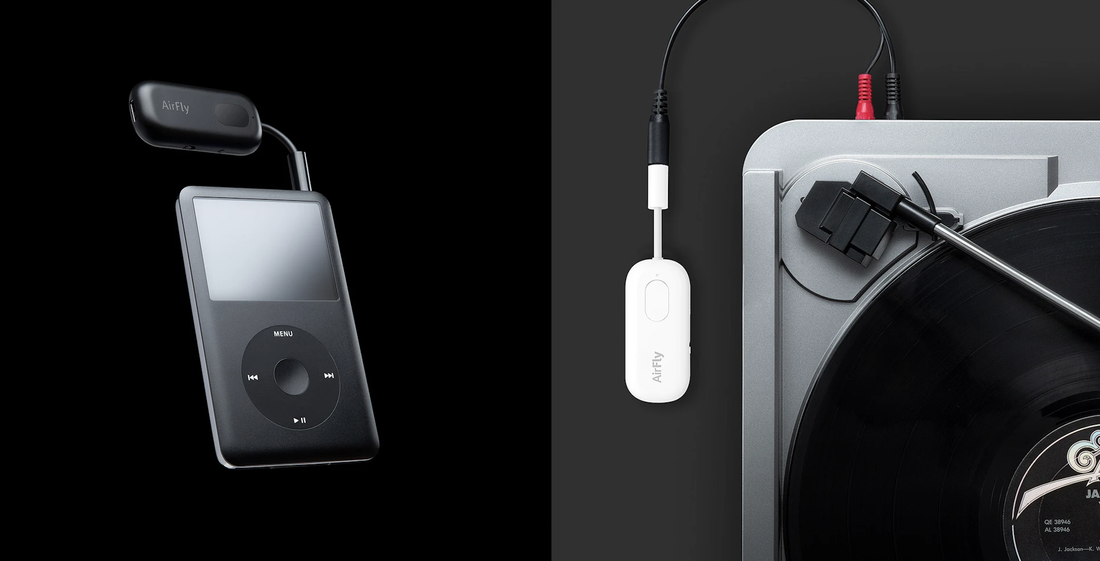 © TwelveSouth TwelveSouth thinks they have the answer in the Airfly (pictured in title photo) and the Airfly Pro (pictured above), a bluetooth transmitter directly marketed for AirPods, hence the name. I've got my hands on a mid-tier turntable (AT-LP60), a modified iPod Classic, the Airfly, the Powerbeats Pro, and AirPods Pro. I'll be testing the standard Airfly, retailing for just $29.99, in these situations marketed by TwelveSouth themselves. Testing the AirFly with the iPod Classic and Nintendo Switch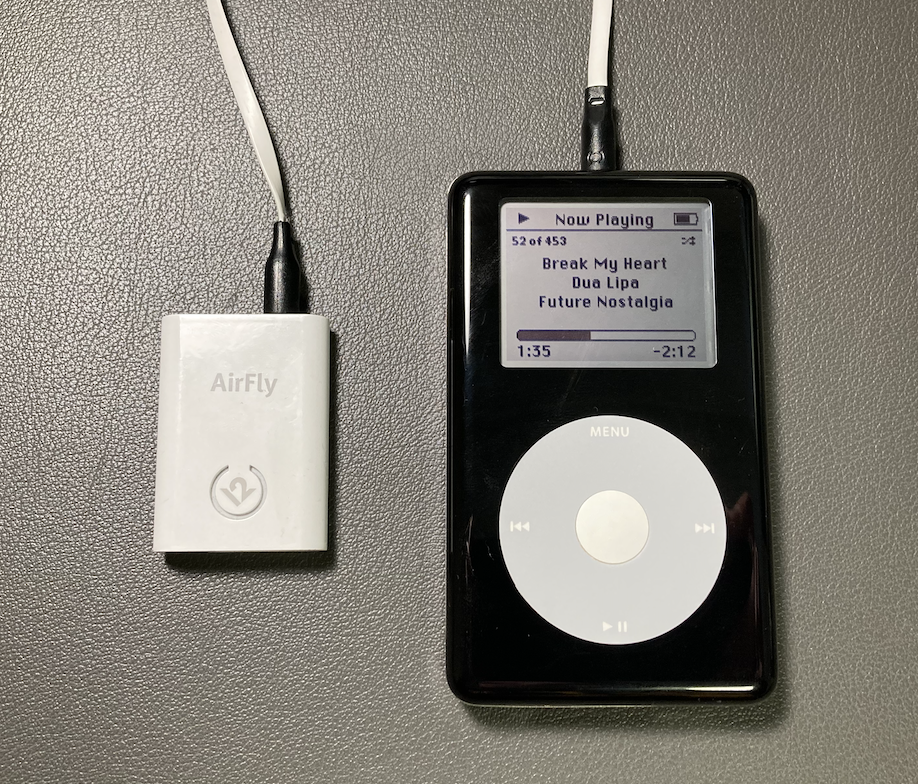 © Brady Snyder It's easy to jump right to the most practical application of vinyl and CDs, but let's start small. The iPod Classic and Nintendo Switch both have internal DACs, or digital-to-analog converters. Digital sound, and thus music, is coded in numbers which are arranged in a way that produces a specific sound. A DAC is needed to convert those numbers back into an analog format, that is, audible sound that you can hear through headphones. This means it'll be a much easer task for the AirFly to transmit something that already has a DAC. So how does it work? Let's start with the pairing process. You'll hold down the only button on the AirFly to put it in pairing mode, and then you'll put the headphones in pairing mode. This'll very based on model, but on the AirPods Pro have a button on the back that you hold down for up to 5 seconds to enter pairing mode. After a few seconds, they're paired. One important thing to note: the AirPods must remain in the case while pairing every time you use them, and they won't work properly if they're in your ears before connecting. 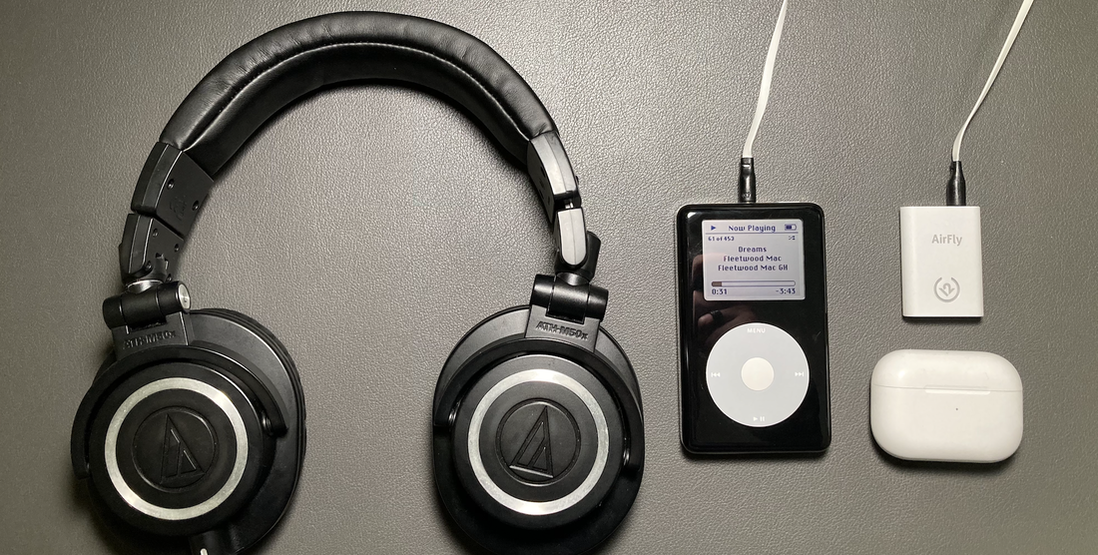 © Brady Snyder The sound quality is as perfect as you can get through bluetooth, I hear everything in AirPods that I do with my studio-quality ATH-M50x's. The volume, on the other hand, is significantly decreased—I'd guess that through the transmitter can get to about 75% of their full volume. The Powerbeats Pro on the other hand had a significantly louder max volume through the transmitter than the AirPods, and that's a trend that'll continue throughout the review. The larger profile of the Powerbeats Pro, and larger speaker driver, probably explain this. I'll offer a different reason, though: The Powerbeats Pro have volume rockers on both sides, meaning you can control the volume in the headphones themselves, while the AirPods Pro require the device to control volume. While using the Powerbeats Pro, I can control the volume on the headphones and on the iPod, resulting in a much louder volume. All in all, the experience is pretty great. The only problem is that the portability you gain by having truly wireless headphones is lost by having a long cable and a small, but noticeable transmitter attached to your iPod. I found myself reaching for wired earbuds rather than deal with the hassle. While the AirFly did come with a short cable, it was just long enough for the AirFly to dangle around constantly, and it stopped working a few months after purchase. The Nintendo Switch, though, is the perfect application for this. It doesn't need to fit in your pocket. I actually think using and adhesive like command strips to secure the AirFly to the Switch with a short, high-quality 3.5mm male-to-male cable would make a great lightweight portable Switch experience. Testing The AirFly With A Turntable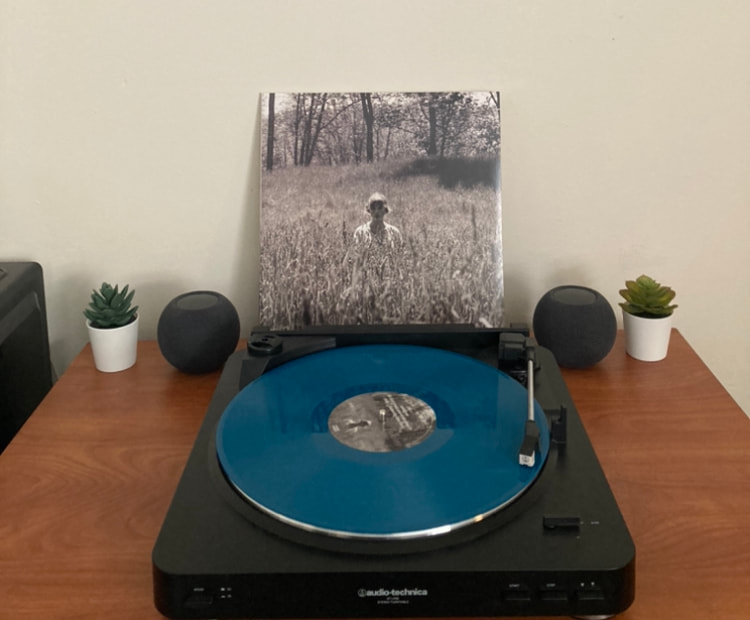 © Brady Snyder, Taylor Swift, and UMG The tougher and more practical task for the AirFly will be connecting and transmitting from a turntable, or record player. In various comprehensive test, there's two distinct situations that offer two different conclusions. If your record player has a 3.5mm headphone jack output, you're good to go. 9 times out of 10 this means the player has some sort of analog output and amplifier built in, and the AirFly can convert this right to digital audio in your headphones. As with the iPod, volume is slightly decreased on the AirPods Pro and just about full on the Powerbeats Pro If your record has RCA outputs, those thick white and red cables you might remember from old televisions or speakers, the AirFly won't work right out of the box. Ironically, this is the exact example shown in AirFly's promotional photo above. These record players, which can be new or old, don't have internal amplifiers and require powered speakers or headphones. As a result, you'll only get 20-30% of your headphones' max volume when connected directly to the record player. 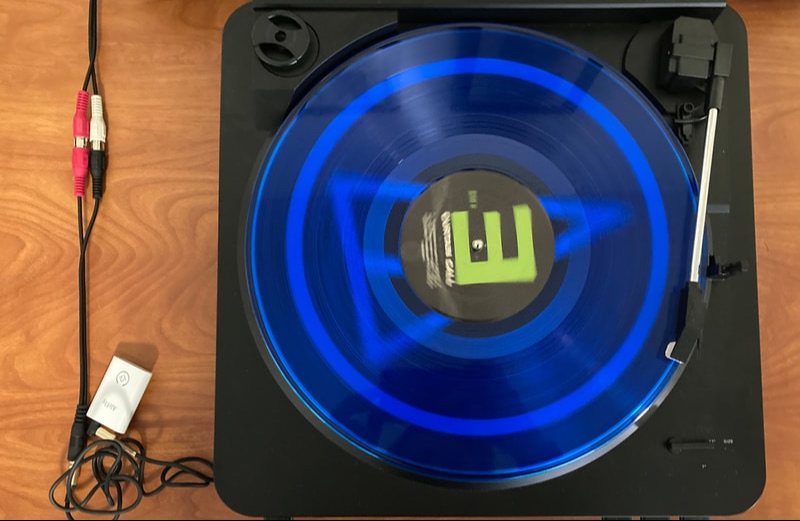 © Brady Snyder If your record has RCA outputs, those thick white and red cables you might remember from old televisions or speakers, the AirFly won't work right out of the box. Ironically, this is the exact example shown in AirFly's promotional photo above. These record players, which can be new or old, don't have internal amplifiers and require powered speakers or headphones. As a result, you'll only get 20-30% of your AirPods' max volume when connected directly to the record player. I've gotten as high as 50-80% volume on the Powerbeats Pro with only one connected, since one earphone requires less power than two. 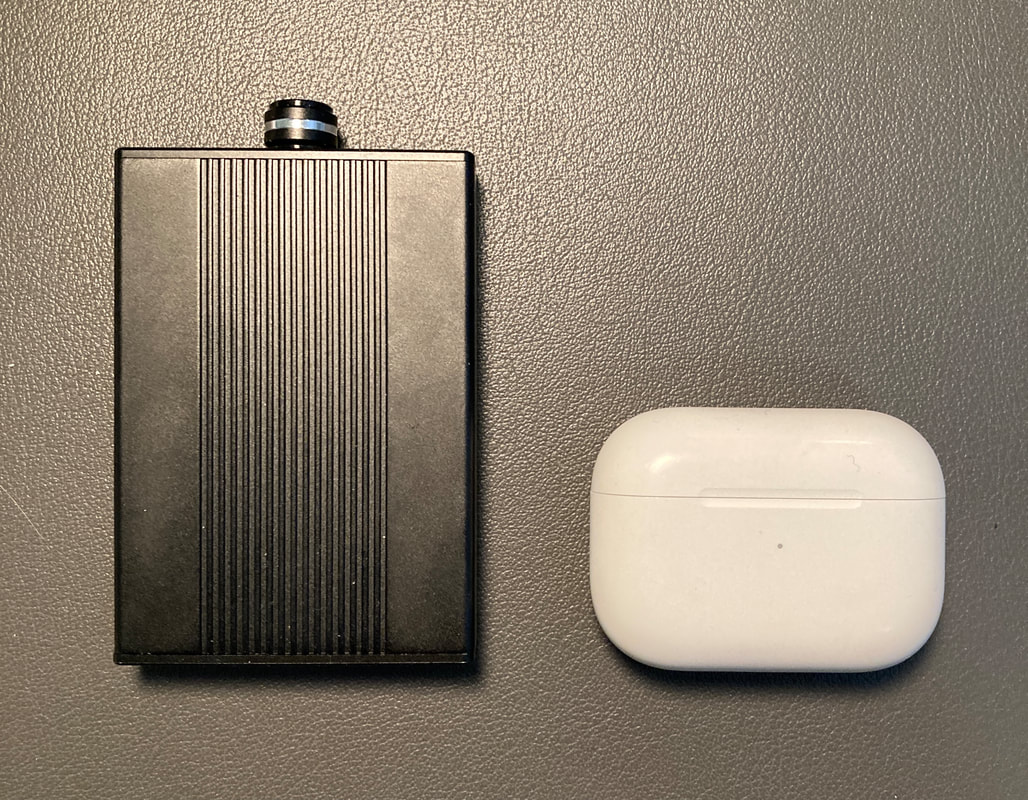 © Brady Snyder There is a solution though, and a simple one at that. All you have to do is put a powered amplifier between the record player and the transmitter. This'll amplify your sound, allow you to control the volume, and more. Better yet--it costs just $20 on Amazon—and I've got it tested and working here. It's pictured above next to an AirPods Pro case for size comparison. 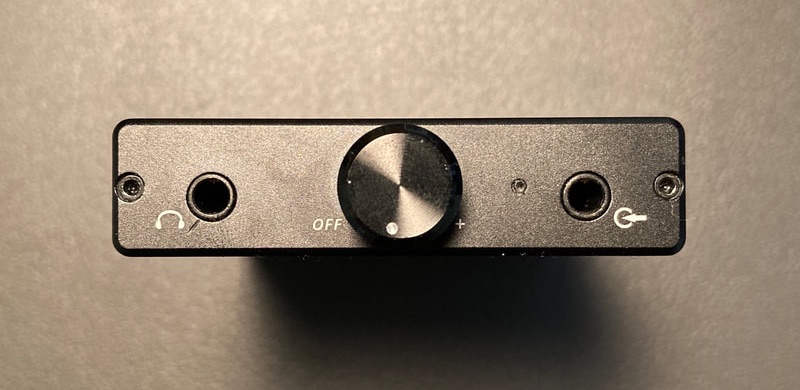 © Brady Snyder Just plug your record player into the right side, and your transmitter into the left, and turn the knob to the right—and you're listening to records wirelessly. This amplifier even has a battery, so you can charge it with a micro USB cable and use it anywhere. Despite the extra hurdle due to the RCA cables and the lack of a built-in amplifier, this method works great! In some situations, the amplifier even allows a higher maximum volume than you'd usually get on AirPods or Powerbeats Pro. Should You Buy The TwelveSouth AirFly?That depends. If you're looking for a portable solution, this isn't a great product. Having a detachable cable is usually a plus, but for portability, this adds bulk. It's definitely not easily pocketable while connected to another device. As for stationary solutions, like a record player or a Nintendo Switch, this might be the best you can get for around thirty U.S. dollars. It's very easy to set up a solution that allows you to connect to your turntable or Switch in just minutes after the initial setup. Walking around the room, house, or apartment while wirelessly listening to vinyl is a very enjoyable experience. Pros: Great battery life, simple pairing process, multiple device support, detachable cable Cons: Low volume in some use cases, micro USB charging, low quality included cables, difficult to pair headphones when other devices are nearby. Overall Rating: 4.0/5 — It gets the job done for most people, and for the price, the cons are manageable. All in all, if you're looking for a way to listen wirelessly to anything with a 3.5mm aux cable, the TwelveSouth AirFly is the most compatible, easiest to use, and cheapest bluetooth transmitter specifically engineered for AirPods. DISCLAIMER: I paid for every item in this review at full price and have had no communication with the sellers about my thoughts, opinions, etc. I do not receive compensation or commission for the included links in this article.
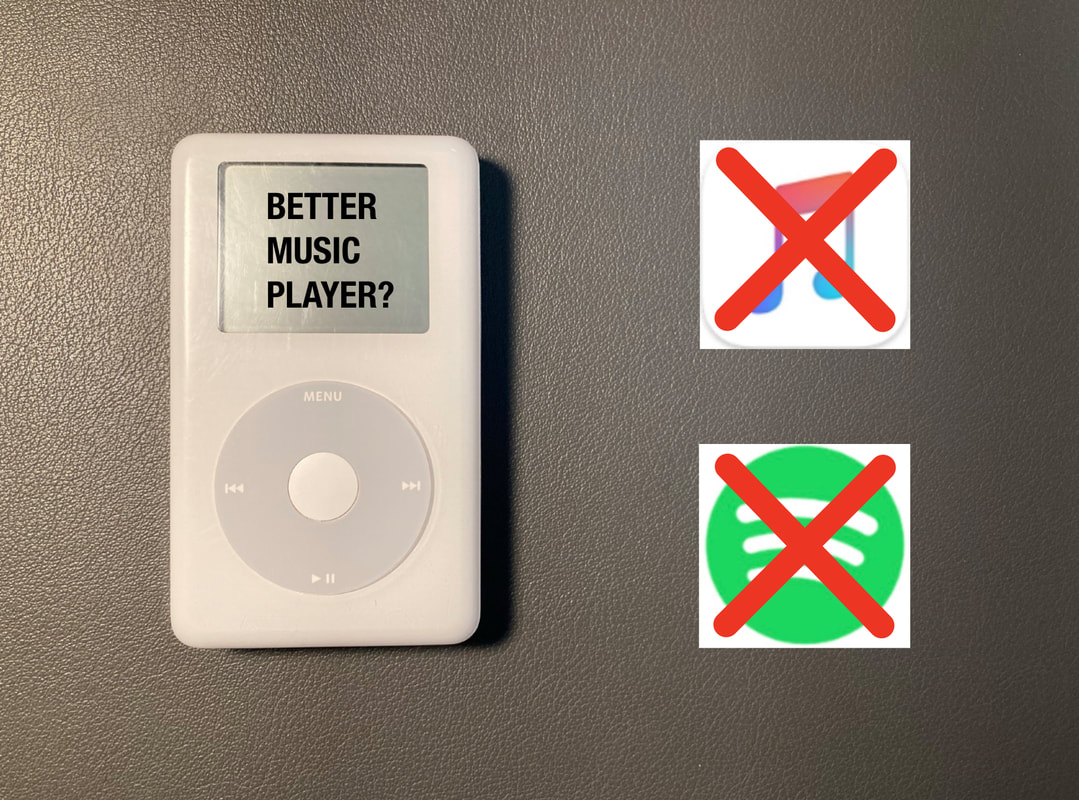 © Brady Snyder, Spotify, Apple Music. It's something many of us enjoy and arguably has been a constant throughout human history. What has changed is the way music is stored and played. Previous music formats, such as Vinyl and Compact Discs (CDs), have come, gone, and returned again. Though digital media was always the goal—now hundreds of thousands of songs can be stored in MicroSD chips as small as your fingertip—the process of playing music was always part of the experience. That's why the so-called "obsolete" media formats like Vinyl, CD, and cassette are making a resurgence. So what about streaming in the Uber-digital age? Streaming music is peak portability and accessibility without the "process" of playing and listening to music. Accessing services like Apple Music, Spotify, and TIDAL offer tens of thousands of songs within a few taps—as long as you have an internet connection. These services vary in subscription prices and tiers, though Apple Music, Spotify, and TIDAL both have a $9.99/mo tier. Despite the clear benefits of streaming services, there are a few problems with streaming services that can be detrimental to music-lovers, and they might not even realize them. Problem 1: Streaming music relegates listening to a "background" task © Brady Snyder Most people streaming music on smartphones, including myself for many years, lose track of music due to the distractions of a smartphone. Music listening in the days of iPods, CDs, cassettes, and records was one experience, not a barrage of smartphone tasks and notifications. When streaming music on your phone, do you remain on your app, listen closely to the sounds, observe the album art, and read the lyrics? 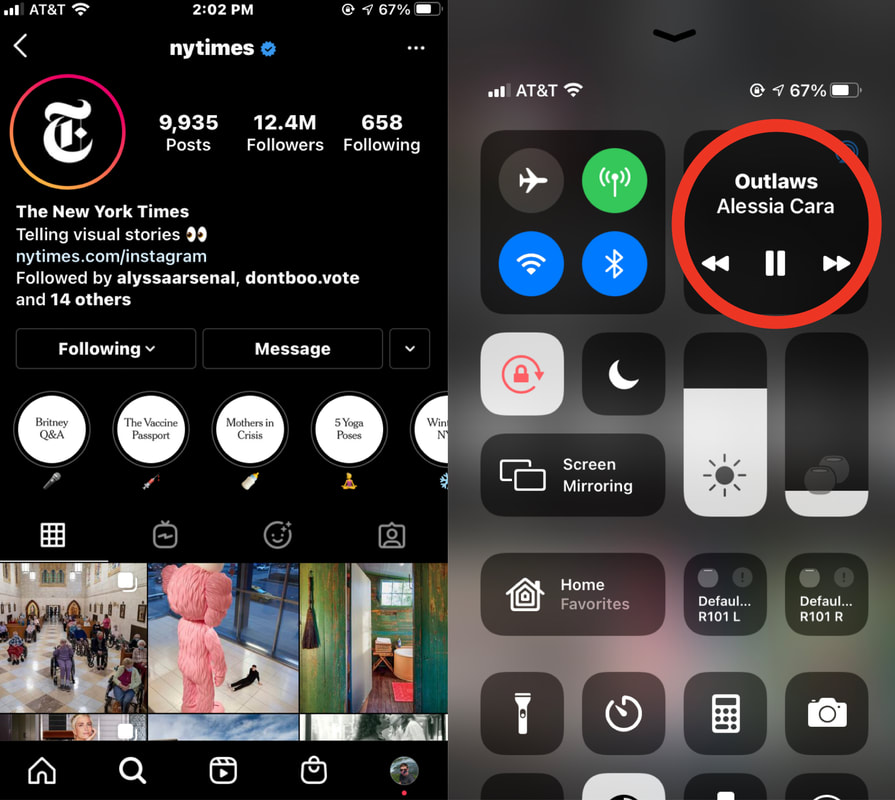 © Brady Snyder It is far more likely that your music experience is closer to the picture above. You're scrolling on social media, texting, maybe even reading this blog—and your music is banished to the control center. Do you really enjoy your music consumption while streaming on your phone, or is it just something that 'exists' while doing other things? If you are someone that appreciates music and would like to change your habits, the best way is to find another media source. Smartphones set listeners up for failure because they have the entire world at their fingertips. Try investing in other formats, like CDs, Vinyl, or a dedicated music player—like an iPod or MP3 player. You might even have some of these formats lying around your house, and if not, the entry prices are far lower than that of a streaming service that costs close to $150 per year. Problem 2: Price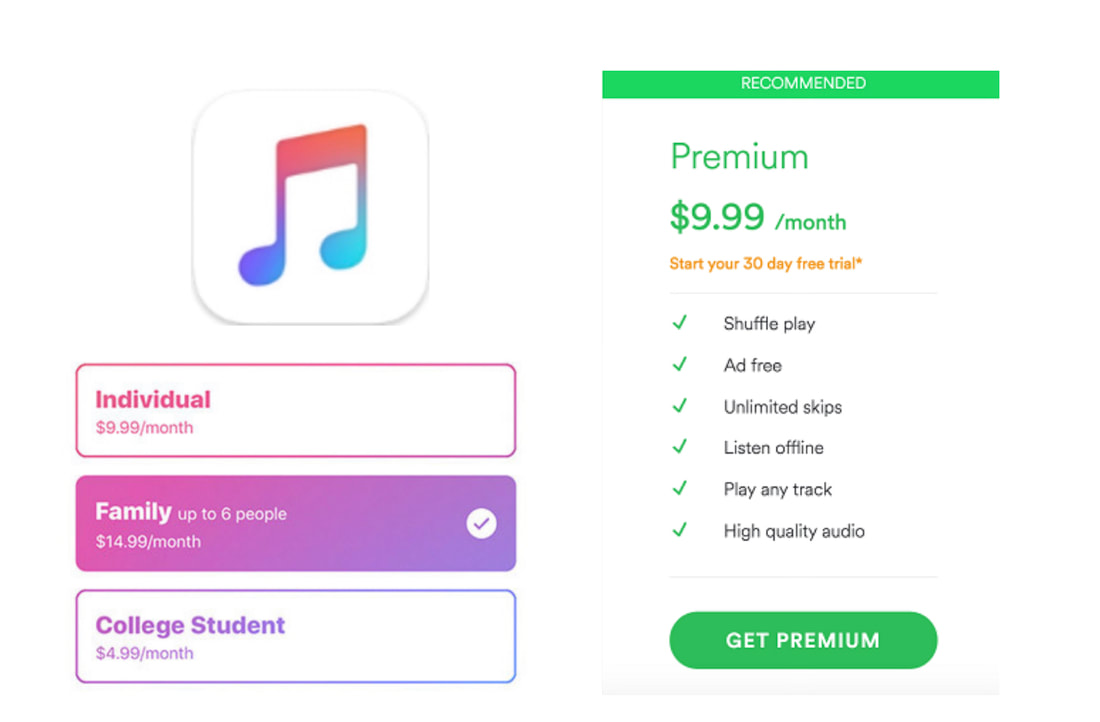 © Apple, Spotify Many people have simply accepted the monthly fees of subscription streaming services due to the plethora of options they offer. But are they really a good deal? Both Apple and Spotify's unlimited streaming plans start at $9.99/mo., or about $120 per year before regional taxes are added. That's a steep price to pay for music that can generally be heard on sites like YouTube free of charge. What's more is that digital music is coming down in price to own every day. Award-winning albums that used to cost north of $15 to own can now be had for as low as $5. Individual songs used to be standardized at $1.29 per song, but now many can be owned for just 69 cents per song. That's enticing, as you can own about 8-12 songs per month, or select entire albums per month, for the same price as your streaming service.  A song that was released a month ago today, 34+35 Remix, is priced at just 69 cents despite currently holding the #4 spot on the Billboard Hot 100 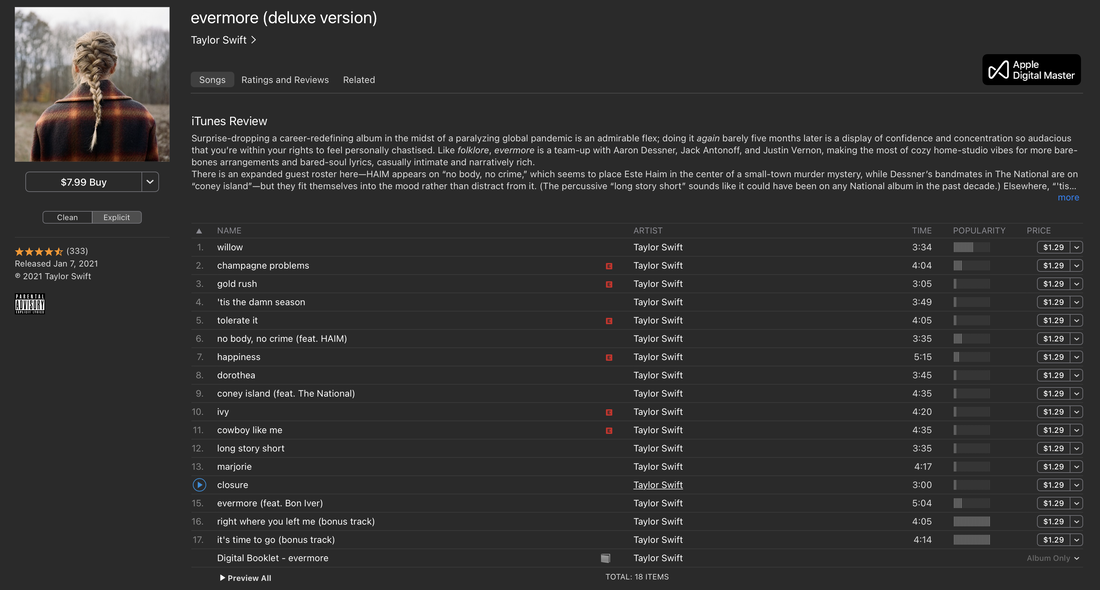 Taylor Swift's evermore (deluxe version) is priced at just $7.99 while including 17 tracks and debuting just over a month ago. Considering that your access to music ends as soon as you end your subscription, you have two choices: Commit to spending $120 per year for the rest of your life or own your music. Own your music.Music should be something we enjoy, cherish, and experience fully. It shouldn't be something experienced in the background.
Streaming music is like leasing a car to drive through scenic routes. You have to keep leasing the car in order to keep driving through the scenic routes, and soon enough, you've made so many payments that you could have owned the car outright. Moreover, you're not "experiencing" driving the car, you're experiencing the scenery. Owning the music you enjoy on Vinyl, CDs, or MP3s can form a deeper connection with your music, and might even save you money. 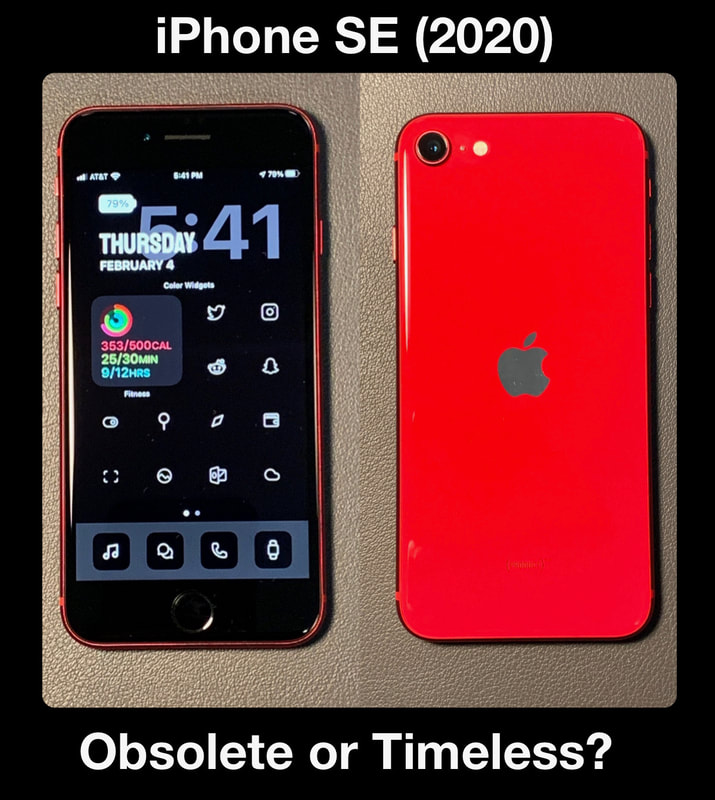 Brady Snyder The design, home button, and gigantic black bezels of the iPhone SE will immediately invoke one of two emotions: nostalgia or disgust. On one hand, the design is familiar and has been perfected. On the other hand, it shares the same dimensions of the iPhone 7 (released in 2016), and its ~1/2 inch bezels on the top and bottom of the front glass are a holdover of an obsolete design that has been all but banished from modern smartphones. This wasn't a purchase I wanted to make, nor was this a post I had my eyes on writing. It quite literally fell into my lap, after my iPhone XS Max fell three feet into the tile floor in my dorm room. Yes, you read that right—the 256 GB iPhone XS Max that retailed for $1249 on release day a little over two years ago. This may be precisely the position you find yourself in at some point, considering that as soon as you crack the back glass of a modern iPhone, the repair price can be anywhere between $350 and $550. Repair isn't even an option at that price, so let's say you walk into a carrier store and ask them for the cheapest new iPhone they have. They'll hand you this iPhone SE at $399 (I will end up paying $150 through an AT&T installment plan). Maybe you haven't broken your phone—you're due for an upgrade instead—and you come to the realization that paying over a thousand U.S.D. for a phone that a) may break or b) will be outdated in a few years is absurd. Here are a few questions you might have: How much of the premium iPhone experience do you get at just a few hundred dollars? Is there feature parity between devices? Will I be disappointed switching from a modern iPhone to an SE down the road? My first impressions may surprise you. 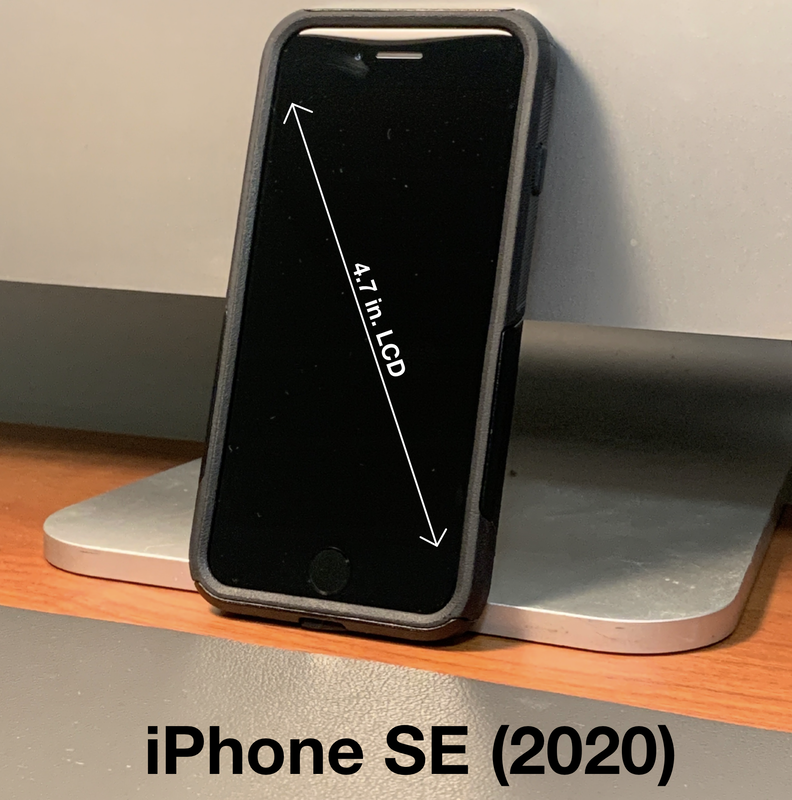 Brady Snyder Undoubtedly the first thing you'll notice about the iPhone SE, especially coming from a modern iPhone is the display. Compared to the aforementioned iPhone XS Max's 6.5 inch OLED display, the iPhone SE's 4.7 inch LED display feels minuscule. The bezels are massive compared to the thin bezels that line the exterior of modern iPhone displays, though their uniformity will be preferred by some who hate the horizontal asymmetry caused by the Face ID notch on modern iPhones. In fact, after a few hour learning curve, I actually preferred the smaller iPhone SE's display to the XS Max's. The smaller form factor of the SE made typing with both hands much easier than the XS Max, and fit comfortably in the hand compared to the long XS Max. Unfortunately, I've also noticed some significant cons to the SE's display in just about 24 hours of use. First off, the LED display. A light-emitting diode (LED) display has a backlight, meaning light is shined through all of the display's pixels, even those that are black. On an organic light-emitting diode (OLED) display, which the Pro and Max line of iPhones have used for a few generations, has lights on each individual pixel, meaning that black pixels can be turned off completely. This in turn produces much deeper blacks than an LED display. If you've used an OLED before, you'll notice the backlight bleeding through blacks and grays immediately. Second, a feature introduced with Face ID called "Tap to Wake." It's that feature that allows you to tap the front of your iPhone and wake it immediately, and it's absent on any iPhone without Face ID. This means that you'll have to physically press the home or power buttons to wake the display. It shouldn't be a deal breaker, but it has been a noticeable deterrence in the first day of use.  Apple Luckily, in my first impressions, this is where the cons end. The A13 Bionic silicon powering the iPhone SE is the exact shame chip powering the iPhone 11 Pro Max, despite the 11 Pro Max costing almost five times more. It's also powering a lower-power and smaller screen, which should offer great performance and even better battery life—and so far, it has delivered. The SE feels snappy and fluid through iOS 14.4 and I haven't had to frantically worry about battery life since I got my hands on it.
In a pandemic, Touch ID is absolutely life-changing. Wearing a mask? Just press a finger on the home button and you're device is unlocked. No more typing in passwords in crowded public places anymore, which is a huge security risk. Touch ID should be a downgrade from Face ID, but in early 2021, it doesn't feel that way. All in all, my first impressions are surprisingly solid considering I'm spending a fraction on the SE than my last iPhone. If you're worrying about having to switch back to an "obsolete" design, fret no more. The nostalgia I felt unboxing this phone cements the design as timeless to me, and the transition has been seamless through the first day. Stay tuned for an in-depth review and comparison of every aspect of the iPhone SE (2020) to its iPhone competitors. 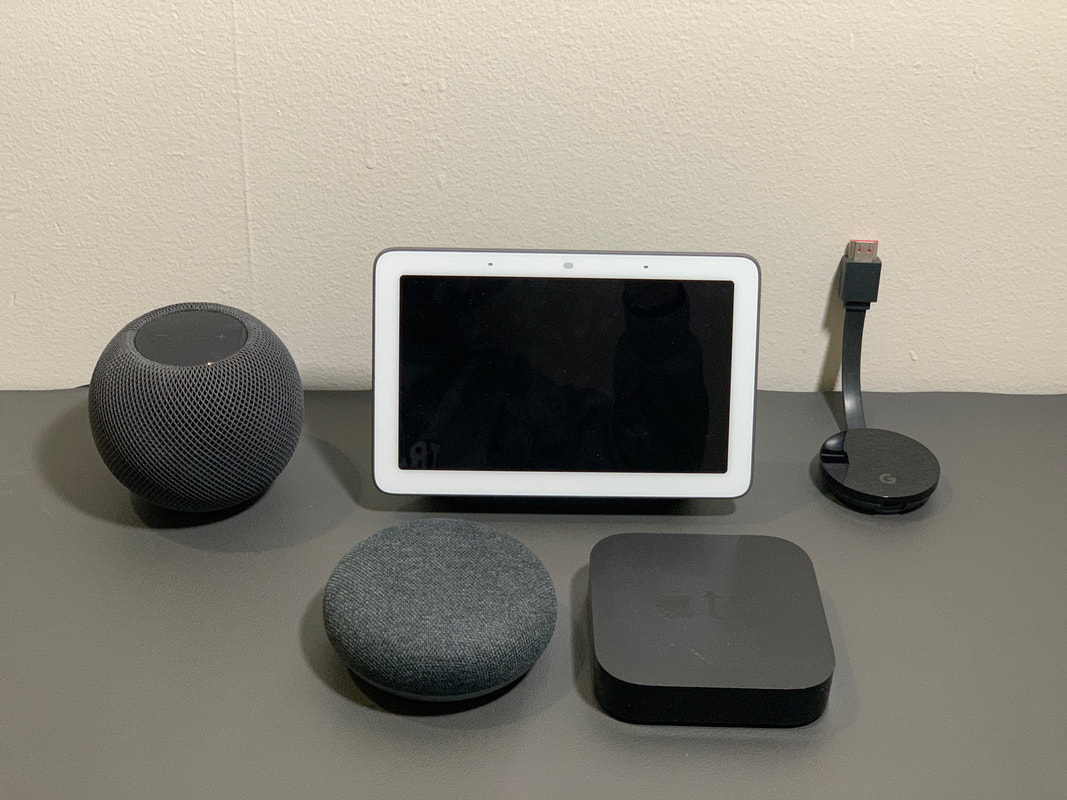 Brady Snyder If you've ever stayed at a hotel, dorm, or apartment and brought your smart devices along, you know this situation. The network either has WPA2-Enterprise protection, meaning you have to enter a username and password, or it has a captive online portal, meaning you have to open a restricted webpage to be granted access. Most smart devices, including an assortment of devices from Apple and Google, have no interface to interact with these networks, rendering them functionally useless. A quick google search, a peak on Apple's Developer Forums, or a long road down Google's support research will provide no answer to this problem. Thankfully, there IS a solution, and it only requires a mobile device for the setup process and a computer. A few quick caveats to note: This process does not change the fact that WPA2-Enterprise networks do not support Peer-To-Peer Networking, meaning that some features will not work as expected, or at all. The only way to change this is to setup your own router, which is prohibited in most enterprise workplaces, so it won't be discussed further. This guide will focus on how to setup HomePods with the use of a Mac computer. Any computer can be used to do this with any HomeKit device. You will need to follow the steps as described and find similar commands in your respective operating systems. Setting up a HomePod on a protected network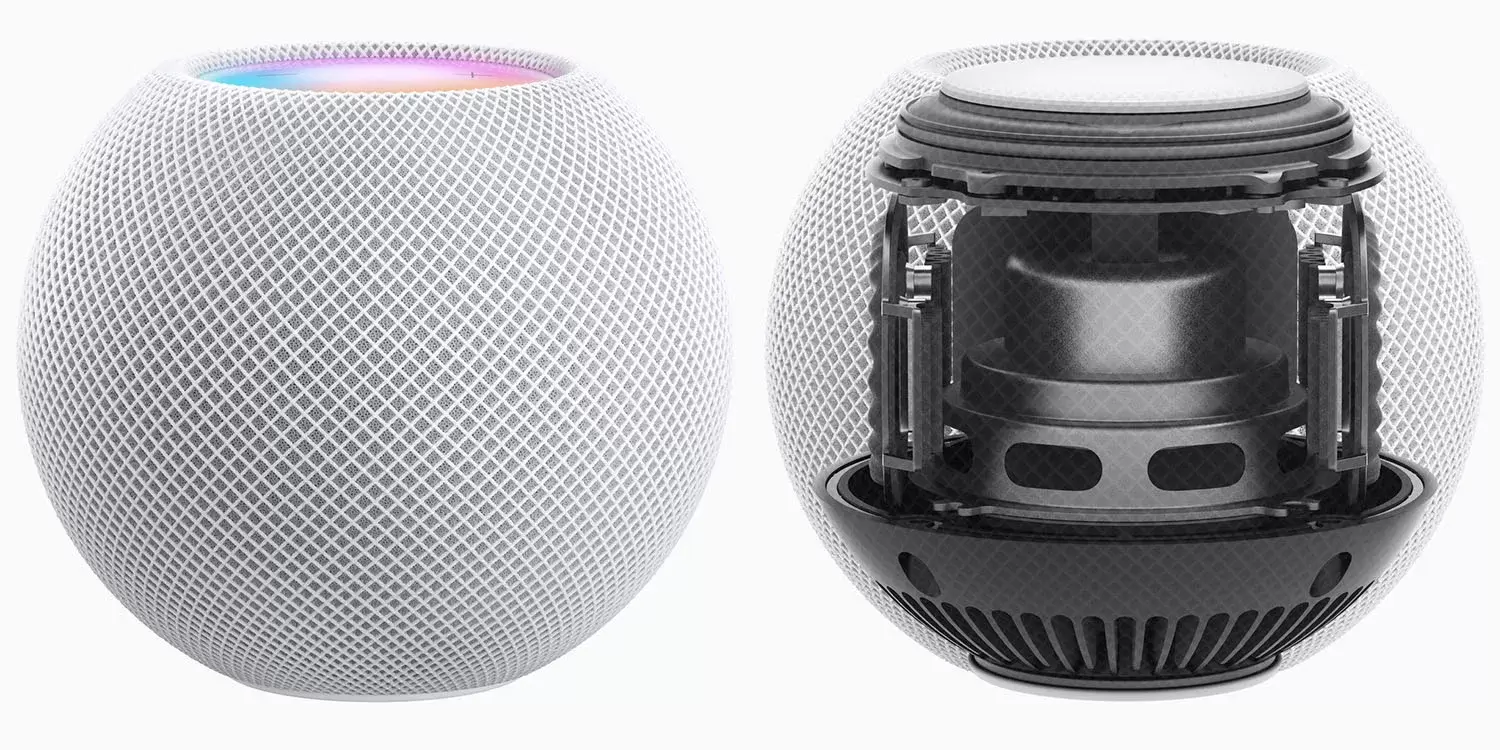 Apple This portion of the guide will cover how to set up a HomePod. The guide was creating using the iPhone XS Max on iOS 14.4, the HomePod mini, and a MacBook Pro running Big Sur—but will work on any combination of HomeKit, iOS, and OS X/MacOS devices. To begin the setup process, bring your iPhone near the HomePod. Make sure that your phone is connected to the WiFi network you plan to connect your HomePod to. Next, connect your HomePod to wall power. 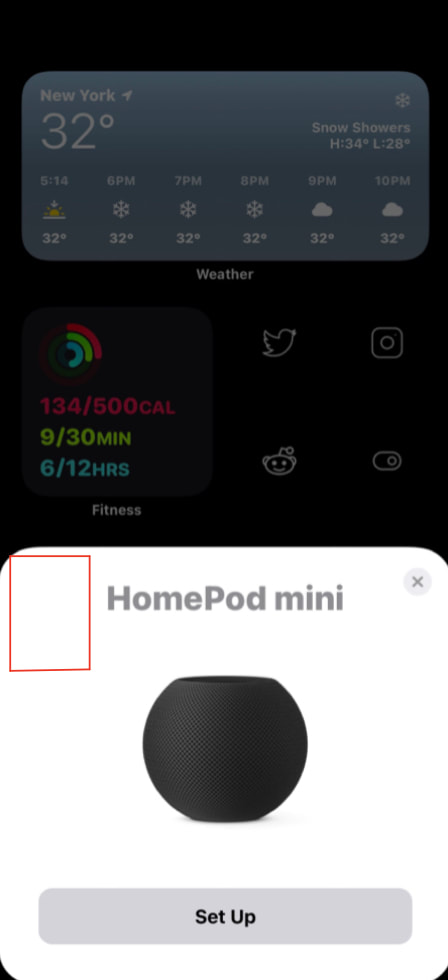 Brady Snyder Once you have unlocked your iPhone in range of your HomePod, the setup bubble will appear on your Home Screen. Tap the upper left portion of the setup bubble until an 'i' button is revealed. 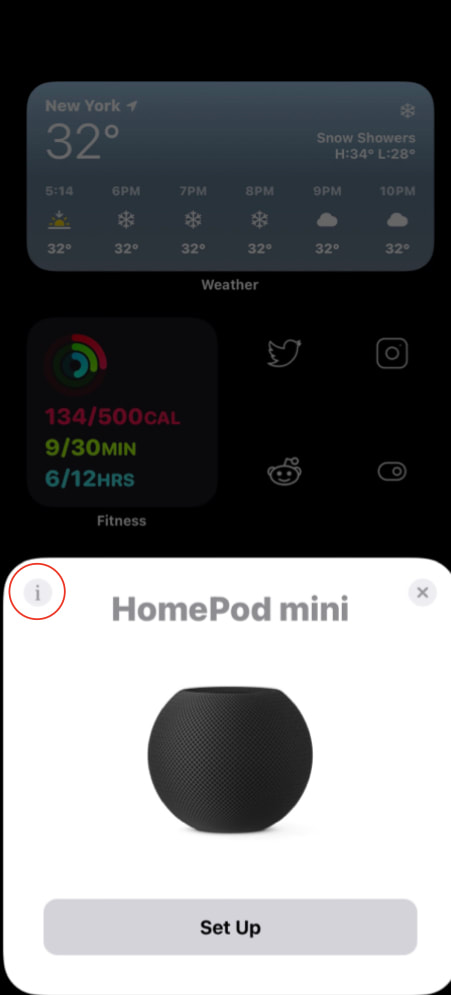 Brady Snyder Once the 'i' appears, tap on it to reveal your HomePod's hardware information. 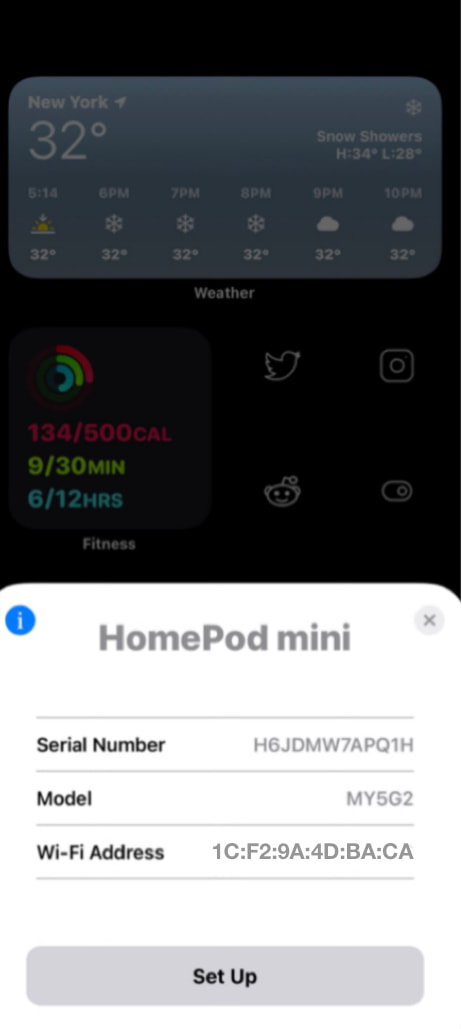 Brady Snyder The setup screen will now show your serial number, model number, and WiFi address. The WiFi Address is more commonly known as a MAC address, and it will be referred to as such throughout this guide. Take a screenshot of it, write it down, or add it to the notes app in your Mac computer—or all of the above. This address is crucial to using your HomePod on your network. DO NOT press the 'Set Up' bubble until you have completed the steps in this guide. Using your Mac to approve your HomePodEssentially, to make a smart device work on a protected network, you must "disguise" your Mac as the device and sign in with your credentials. This involves some very simple command lines, and can be achieved in just a few steps. First, start up your Mac. You'll be looking for the WiFi symbol in the Menu Bar.  Brady Snyder Press and hold the option key while clicking on the WiFi symbol in the Menu Bar. This will open a longer dropdown menu. 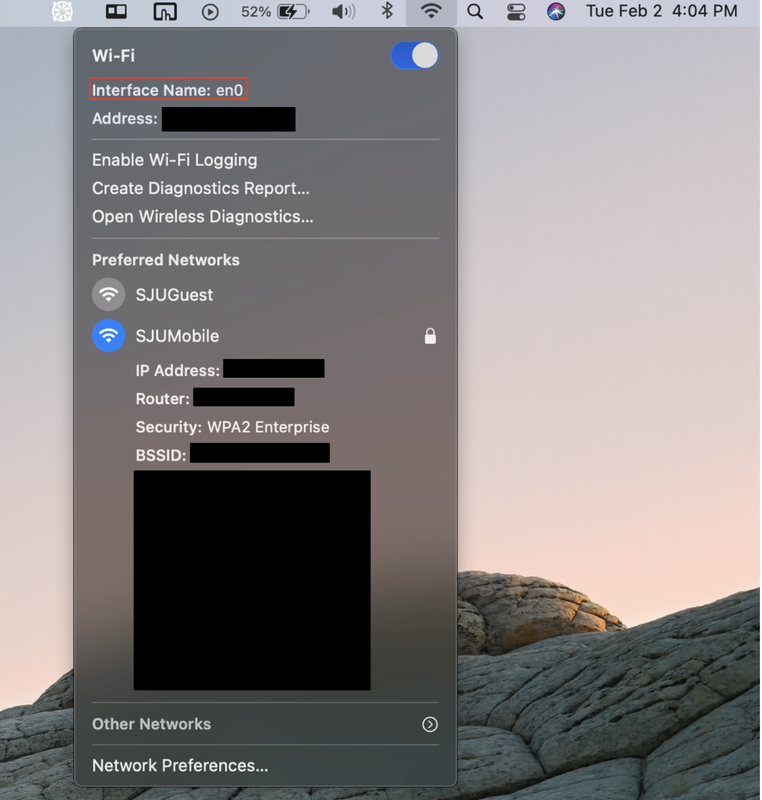 Brady Snyder Take note of the 'Interface Name' located at the top of the WiFi menu window. On my MacBook Pro, the WiFi interface name is 'en0'. On Macs with Ethernet, Thunderbolt, or FireWire network capabilities, your interface name could be any name from en0-en3. You will need this interface name for a command line later in the guide. At the very bottom of that same WiFi window, there will be an option to 'Open Network Preferences.' Select that option, and a System Preferences window will open automatically. 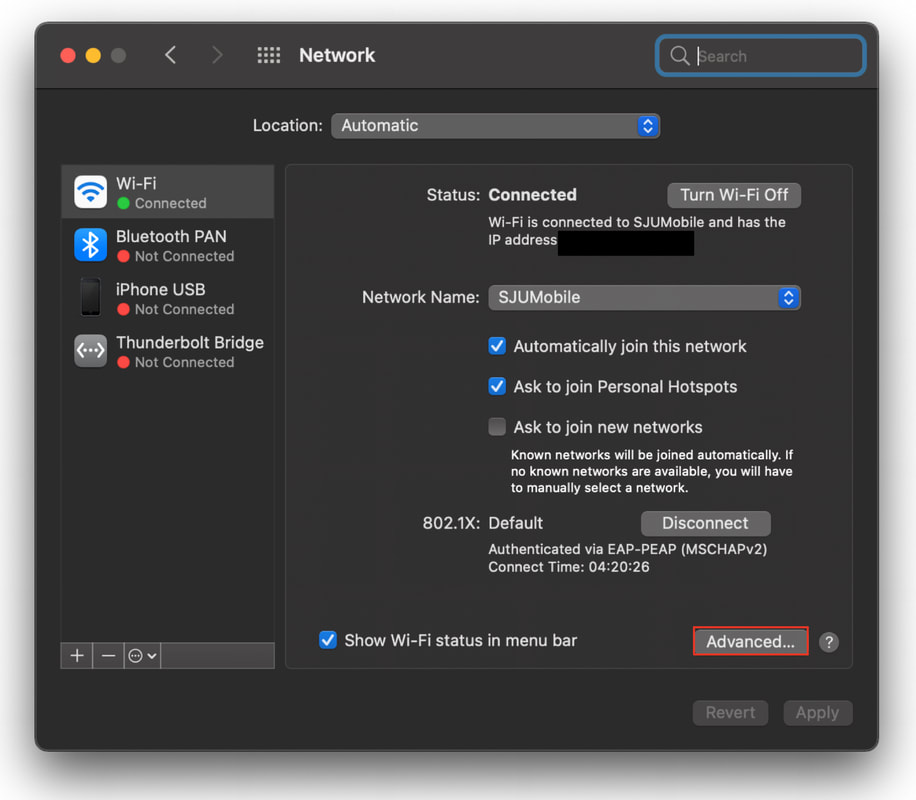 Brady Snyder Click on the 'Advanced' bubble at the lower right of the window. 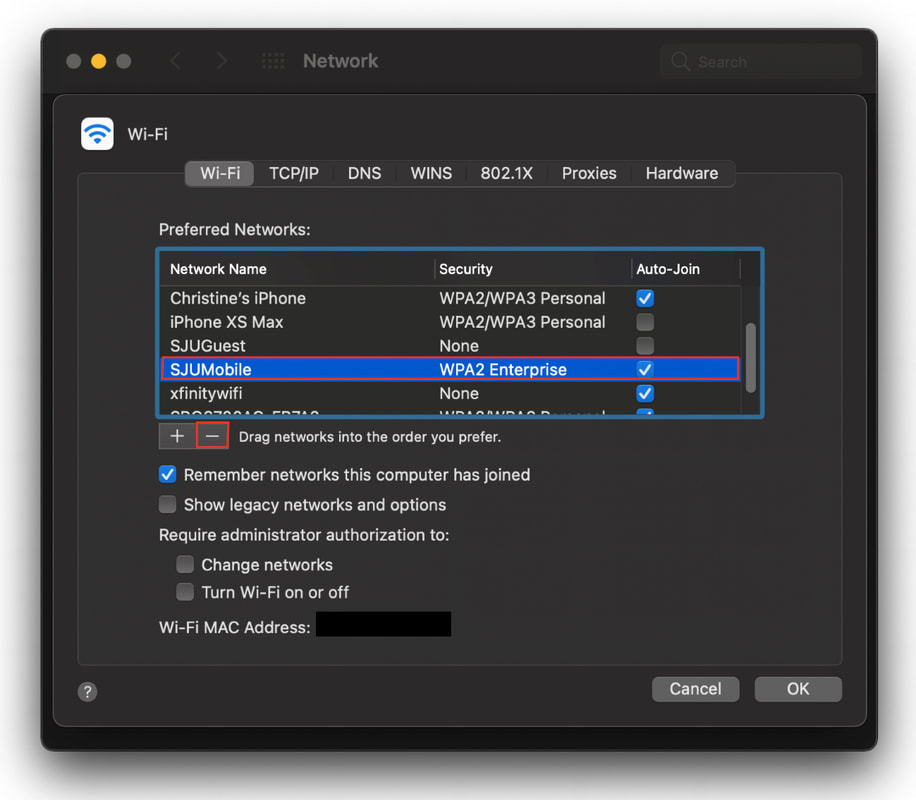 Brady Snyder You'll be presented with all of the networks you have connected to with your Mac. Find the network you want to connect your smart device to and click on its name. The entire network name should be illuminated in blue; in my case, SJUMobile is highlighted in blue. You will then click the '-' button directly below the list of networks. This will disconnect and forget the network; you will need to re-enter your credentials later. At this point, it is best to turn off WiFi completely. Using Terminal to 'disguise' your Mac's MAC addressTerminal is just a program without a graphical user interface, so all commands are entered via text. It'll look a bit intimidating at first, but if you know exactly what commands to enter (below), it's as easy as typing on a keyboard. You can launch Terminal in the following ways: -Find Terminal in your computer's Applications folder -Press Command, F to open a finder window; search for Terminal; open the application -Press Command, SPACE to open Spotlight, search for Terminal, press the return key. When Terminal is open, it'll look like this: (will vary based on OS X/MacOS software version)  Brady Snyder Once terminal is open, enter the following command. Input your computer's WiFi Interface Name and your smart device's MAC address into the command line. sudo ifconfig <Interface Name> ether <MAC address>  Brady Snyder Enter the command line with your interface name and MAC address added. Use the screenshot above as an example. Once you have typed the command correctly, press the return key to run the command. Note: You will need to enter the password to an administrator account on your Mac in order to run any 'sudo' command lines.  Brady Snyder If you've successfully ran the command line, you will see a new, blank command line under the 'Password' prompt. In my case, 'bradysnyder@Bradys-Macbook-Pro ~ %' lets me know that my command ran without any errors. Reconnecting your Mac to WiFiNow that your Mac has forgotten your network and appears to have the MAC address of your HomePod, it's time to reconnect to your WiFi. Brady Snyder Click on the WiFi icon in the Menu Bar, and a list of your available networks will dropdown in a new menu. Select the network you want to connect your HomePod to.  Brady Snyder After selecting your network from the menu, a window will appear asking for your WPA2-Enterprise credentials. Enter your credentials to approve your HomePod on the network. Finishing the setup processThe first thing you'll want to do to finish setting up your HomePod is to restart your Mac. Since you changed your MAC address to match your HomePod's, your HomePod will not be able to connect to WiFi since your Mac is using the same address. Simply restarting your Mac will revert its MAC address to its original address. After you've restarted your Mac, make sure your iPhone is connected to the same WiFi network you will use to set up your HomePod. Then, bring your unlocked iPhone near your HomePod and the setup bubble should return. Note: If you can't get the setup bubble to return, lock your iPhone and walk away from the HomePod for a few minutes. Then, bring your phone within a few inches of the HomePod and unlock it. The setup bubble should return. 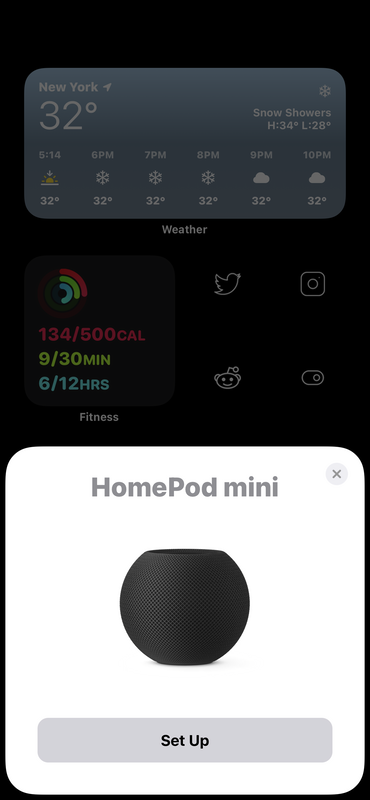 Brady Snyder Simply press the 'Set Up' prompt and continue the setup process. The following settings are personal preference, though selecting 'Do Not Use Personal Requests' has been found to improve performance. The HomePod may load for *a while* but after setup is complete, you will be greeted with a "Hello" from Siri and this message: 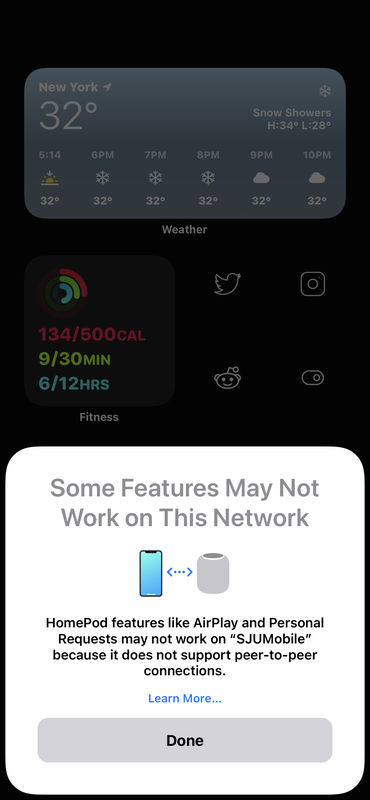 Brady Snyder This message simply informs you that since WPA2-Enterprise networks do not support peer-to-peer connections, some features won't work properly. I've found that Personal Requests do not work, but AirPlay 2 works perfectly fine. You can even pair two HomePods in stereo on a WPA2-Enterprise network. Press 'Done' and your HomePod is ready to use! ConclusionThough many HomeKit, Google Nest, and other smart home devices lack WPA2-Enterprise support, this guide offers a way to connect to a protected network despite a lack of support. This guide was specifically made for Apple's HomePod, but will work with ANY smart home device provided you can access its MAC address.
Tried this guide? Have a question or suggestion? Leave a comment below! |
Brady SnyderJournalism student at St. John's University. Expert of all things Apple, both hardware and software. Categories |
 RSS Feed
